Thursday, March 19, 2009

Brake Bias Adjuster

Fitted this to the bias bar, I'm not sure where I'll mount the knob yet, and perhaps I'll leave it tucked away until after IVA, although if possible I'd prefer to 'lock' the adjuster knob, rather than drill through the bias bar itself.

I need a grommet to go between the panel and the cable, I don't have any that size so will do this at a later date.

Panelling

Started on the panelling, got the floor in, and started on the other ones, panel work is my least favorite car related activity.

Video Improvements

The wiring for the in car video was becoming a pain in the ass, so I tidied it up. The biggest issue was that the switching box, that enables me to switch cameras front/rear has 2 cables going in the back, and a big cable coming out the side, it has 2 channels that I don't use and was generally just the wrong shape/size for the job.

I opened it up, as its basically just a switch inside, and removed the output wire, and then resoldered the connectors on the rear so that they are switched, and used one of the spare inputs as a new output.

This worked great, except the switch melted when I soldered it. I didn't notice this of course until it was back together again, so I had to open it up again and replace it with a toggle switch. It now works perfectly.


I then mounted this back within easy reach, just forward of the handbrake, under the gearstick, I can now flick it pretty easily without moving my hand far from the wheel.

The next thing to sort out was the power wiring, I have the cigar lighter, intercom, and cameras powered from the same feed, and it was getting a bit untidy, so i cut it out, made a new mini-loom, and refitted it.  Whilst I was at it, I routed the power cables through the transmission tunnel which in turn made it even tidier.

This left me with a tidier installation for the permanent cables, but the DVR goes in and out, and currently gets thrown in the foot well or the passengers lap, this wasn't so practical so I made a holder which I mounted below leg level in the passenger foot well.


I made this by first making a template based on the DVR, the DVR has cables coming out of one corner, in different directions, so i let this protrude from the top, the rest is covered up.  


I then cut the template out of aluminium using snips and bent it into a box shape using the vice and various hammers.

Drilled it.

 
Covered it in some carbon fibre vinyl sticky stuff for added bling, and mounted it.

The wiring still needs tidied up, but this can be done with some cable ties, the only loose cables now, are ones which are removable.

Drive to work

Drove to work in the Seven today, driving pretty well, although do have to be careful when coming on the power as the back end slid out quite a bit on the way home.  Its so fast off the line you can really be up to some decent speeds before you realize it.  Have been experimenting with the new video setup, hopefully will get some usable videos this time.  I noticed (too late) that the DVR doesnt save its settings, so it used ASF again, which of course isn't ideal on a MAC.

Heater

Heater arrived for the Fury, its a very small and pretty light heater unit.  I got it from GT40 Parts on ebay, it weighs 1.2kg, and I'll probably be able to get that down further using some aluminium plate.


Its pretty powerful, the only hard part is going to be positioning it so that it isn't the lowest point in the system.

Saturday, March 7, 2009

Exilim Video

Clip coming back from Laag Vuursche with Paul a few weeks ago. Camera is a casio exlim and a suction mount on the scuttle.  For what it is, its not bad.


4kam DVR

It was a nice morning today so I went to the garage and got the seven out.  I decided to find a way of powering up the 4kam DVR as the uk charger wasn't working even with my array of adaptors.  I butchered the end off a spare TomTom car charger, which also outputs 5v, and cut the end off the original charger, and soldered them together.  Not surprisingly it worked straight off, so I went out for a drive. Saskia came along too which was nice, we went to Laag Vuursche, had a coffee and the rain looked like it was going to spoil the day, the temperature had also dropped so back we went.

There is an annoying reverberation, which I suspect is the carb hitting the bonnet, so i might have to go back to the original engine mounting after all.

The cameras didnt want to record in colour either, not sure what's going on there, going to have start fault finding I think.

Current Status

Engine
  • I'm waiting on the engine mounts from Chris, once those are ready I can fit the engine.
  • Wiring will need to wait, until then it should start using the loom.
  • Exhaust, cat, manifold and tail pipe are on order.
Driveline
  • I need lock nuts and washers for the front hubs, then I can get the front end on the ground.
  • On the rear, I need to get the driveshafts as they hold the wheels on, chris should have these ready by the 4th april.
  • I can then bolt up the hub carriers properly.
  • I need to get a reversing box.
  • Once i get the engine, I can measure the size i need for the prop shafts and get them ordered.  Then the car will drive.
 
Suspension
  • Everything is all fitted, but...
  • I need lock nuts for the camber adjuster.
  • I also need lock nuts for the rear camber adjuster.
  • Once the alignment is done, I'll thread lock and mark the bolts.

Steering
  • The track rod ends don't fit, despite having rs2000 hubs, the steering arms aren't the rs2000 size, (or the track rod ends aren't rs2000 sized) so I need to find the right ones, with lock nuts.
  • Once I get the car on wheels and a seat in, I can mount the steering wheel in the right place, until then I can't fit the support.

Cooling System
  • I'm waiting on the engine before I can proceed, until I know where the appropriate hoses are, I can't order the hoses.  I also need the heater matrix so I can make sure the header tank is the highest point.
  • I can fit the radiator though.
Braking
  • Fit the lock nuts to the pushrods and fit the bias bar.
  • Fit the copper brake lines
  • Fit the bias adjuster
  • Find a solution for the flexible hoses, they are M10 Male, and I have M10 Male nipples, or 1/8NPTF holes.
  • Threadlock everything up, bleed the system and good to go.


More bits arrived

Sadly, not the bits i'm waiting on.  

The header tank.
Prop Adaptor.

Transit heater switch.
Bleed Tee

More Progress

I managed to find a 1/2" drill, and bored out the spacers for the shocks, they now fit perfectly.  I mounted the shocks, but the rear shocks fouled the suspension bracket, so I had to grind the brackets down a bit using the die grinder.

Once ground down, they fit perfectly, and look rather good.

I then started on the braking system, I fitted the master cylinders, and tried to work out the reservoirs.  I had two large reservoirs, and a mounting bracket I was hoping to use these, but they are too tall, and will foul the steering.  I will order shorter ones from rally design the next time I put an order through.  

I want to avoid using rubber hose where possible, so I'm using braided flexible hose for the low pressure line between the reservoir and the M/C.  I got these from rally design, they are way too long though, so I cut them down to size.

The first step is to cut the pipe the right length, a smooth cut is required, and it must be straight else the olive wont fit.  Goodrich/earls/etc fittings are all re-usable, I always replace the olive, as its basically the thing that is holding it all together, but in theory you can reuse those too.  I find using some tape around the cutting face stops the braiding from fraying.

Once you have a straight edge, slip over the locking nut, its easier to do this before you take the tape off, then push on the olive, its a tight fit, so you need to push quite hard, but not too hard you damage the lining, or the olive.

Then the main connector slides into the tube until it meets the olive, then the nut is tightened up tight.  

The finished lines fully fitted look rather good.   The reservoirs are designed to go into a concave fitting, and seal through the fitting rather than the thread.  This causes a problem when mounting the reservoirs, as they do not have sufficient thread to put a lock nut on.  With the fitting secured, there is about 1mm of free shaft.  In order to secure it, i used a plastic washer which is compressed down to the right size as the nut is tightened up and it seems to be doing a good job.


I then fitted the pedals, I can't fit the bias bar, because i need some lock nuts for the master cylinder pushrods, of course, these are UNC thread, and here in continental europe, they are about as easy to find as rocking horse poo.


Thursday, March 5, 2009

2007 R1 Service Manual

2007 Service Manual (US)

Older manuals

From Mediafire

More Links

Collecting the Fury

The chassis came back from powder coating on Tuesday, so I booked a van and went to collect the chassis on the Saturday.  I drove down via dunkirk and dover over night, managed to miss my boat due to the van being too high, by the time I'd paid the surcharge the ship had sailed.

FYI, Norfolkline don't really discriminate between cars and vans as long as its for non-commercial use, when you book online via an agent, you get a billion options for length and height etc, basically, the trigger is 2.4 Meters high, if its over this, your van doesn't fit in the upper (car) decks, and you must go in the main truck decks, for this there is a surcharge.  The maximum length would appear to be 6 Meters, but it is the height that is the one to watch.  

From Utrecht, it is quicker and cheaper to drive down via the channel, than take the crossings from Rotterdam/Hoek Van Holland, although there is a lot of convenience from the overnight crossing if your in the east/north.

Unlike my previous trips through Dover, I didn't have any issues with customs and intimidation, and was out of the port by 9.15, I'd expected it to take up to 45 minutes.  A quick stop at Ashford to visit the bank and I arrived at BGH Geartech.  Chris went through the bits and bobs, and we discussed the build, he explained how the chassis bolted together, and of course I promptly forgot it all, but I'm sure it will all come back to me at the appropriate time.

I had a good nosey around the shop, and at the parts.   Chris hadn't got the engine mounts made up yet, so they kept the engine  as this is the first one they have with the 2006+ engine design.  This is a bit of a setback, because, whilst I had known that the drive-shafts wouldn't be ready, I had instead decided to concentrate on getting the engine plumbed in.  Instead I will have to do a lot of things piecemeal.  

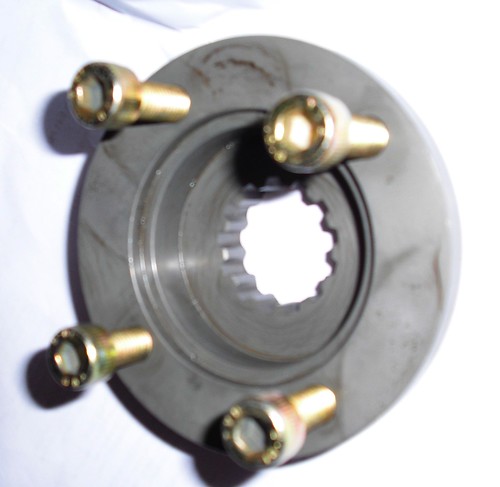
Chris also got some RS 2000 uprights, I wasn't sure if these were the right ones for the hubs as rally design sales guy had said that the alloy hubs used standard bearings. In the end, they were group four hubs, not standard alloy ones like the raceleda set.

Chris was kind enough to let me have a bunch of other bits delivered to their workshop which saved me a few quid on postage.  I found an R1 package on ebay and made a very low offer, assuming it all works, then I've got a bargain.  From the picture the bike had front-ended something, and whilst there is no damage to the engine on the sides (Typical where the bike has slide along the road.) annoyingly  one of the oil pipes has been bent, so I will need to order a new one from Yamaha.  I will also need a new sump gasket and I might as well get some oil too.

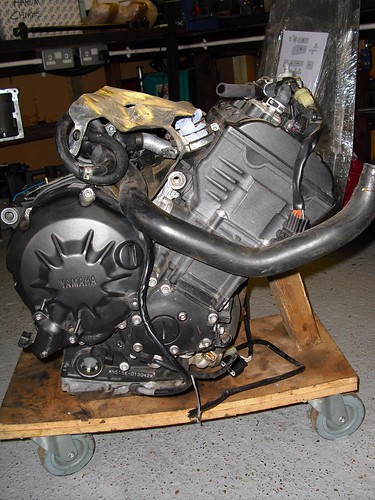
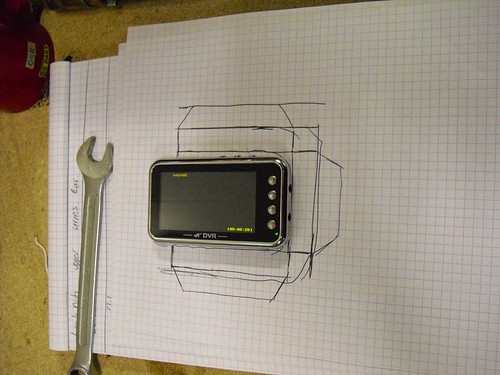
The kit has pretty much everything needed to get the engine to run, it has the filler cap, full wiring loom, switches, clock, engine/gearbox bolts and a bunch of other bits and pieces.  I wont be using the clocks as my primary gauges, but I will leave the connector so that I can connect them up for fault diagnoses etc.

I also ordered another set of driveshaft seals for the freelander diff.  I got these from Qualitypart on ebay.

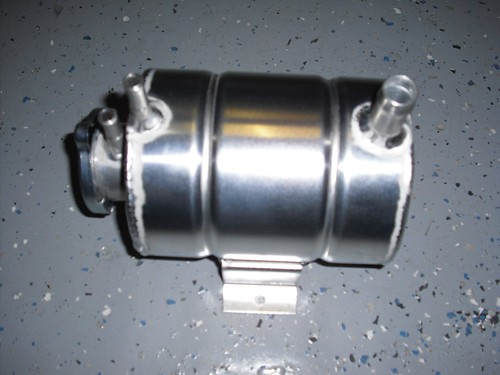
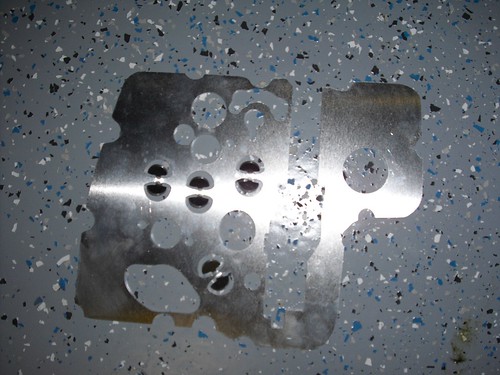
The sump baffle, also from Ebay.  Its CNC machined from 2mm aluminum and looks fairly solid. 

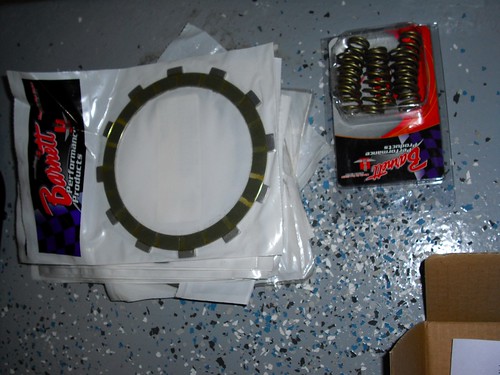
Barnett gold springs, and uprated friction plates. Also from ebay.

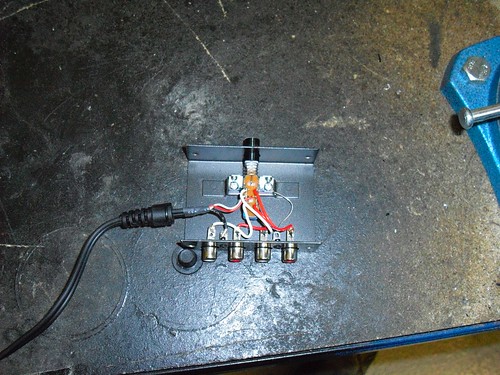
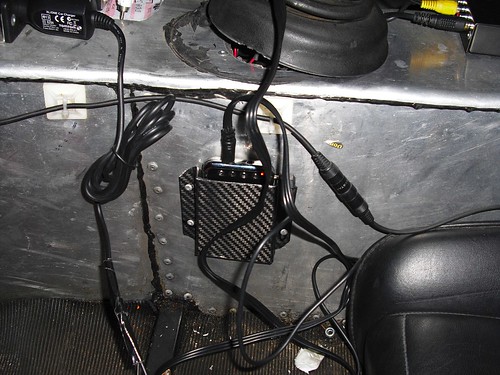
Power Commander, from ebay.

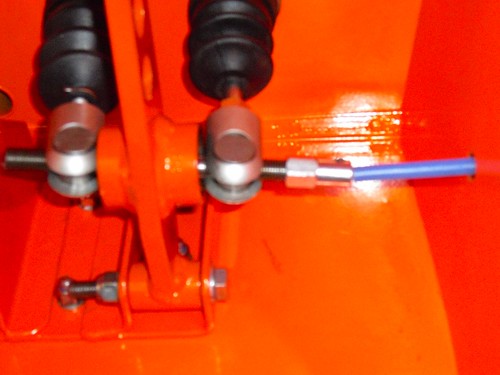
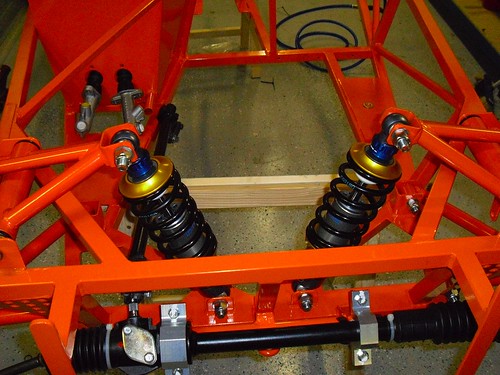
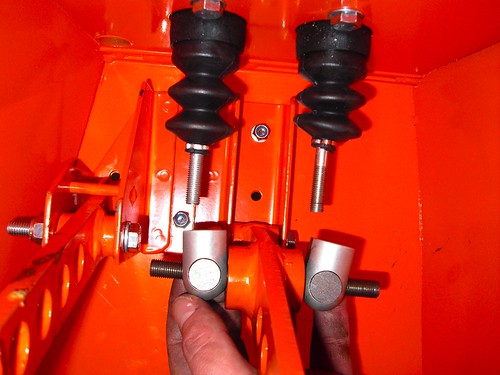
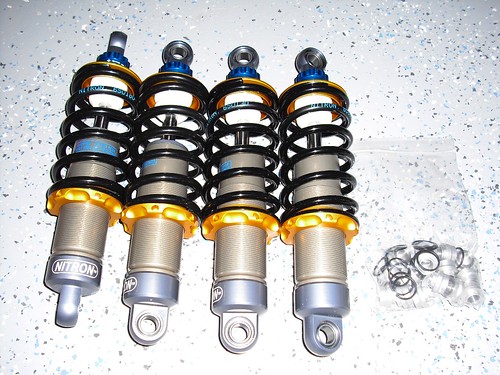
The nitron shocks are a work of art.  These are Nitron NTRs with 180 and 130lb springs.

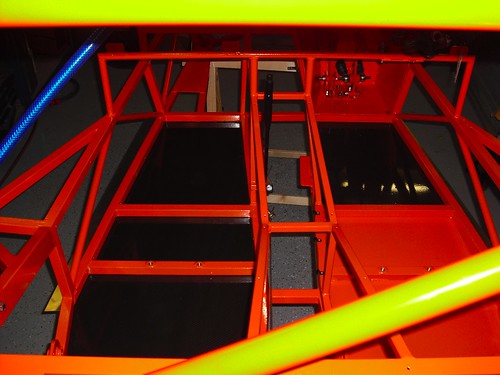
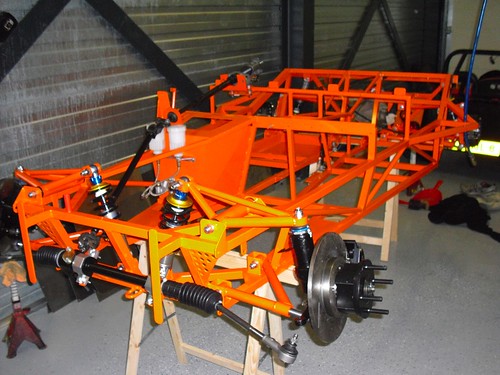
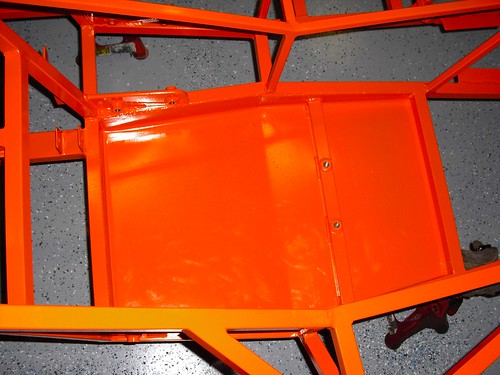
The chassis, powder coated orange,  (RAL 2007) the pedal box is raised to give me more space for my big feet. The pedals are also raised so that they will touch the balls of my feet.

The drivers seat has been lowered an inch to give me some more head room, and make me fit better in the car.

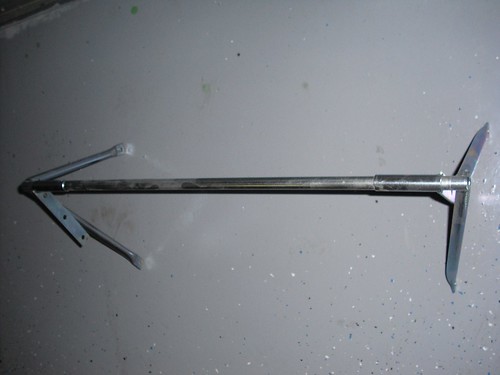
I also collected the Roll-over bar, this has been extended by 40mm as I was too tall for the standard one, this should also stop the supports form digging into my sides as they are moved a little too.

The panel-work is pre-cut, and in theory doesn't require any trimming if you have a standard fury.  In my case I will need to cut them where the lowered floor is, and where the side impact protection/crutch straps interfere with the shape of the chassis.

The bonnet hinge has been plated, but I think I will paint this orange.

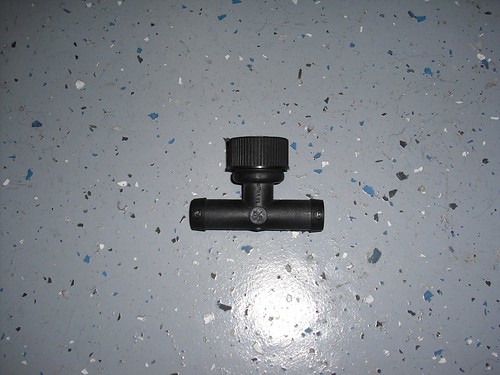
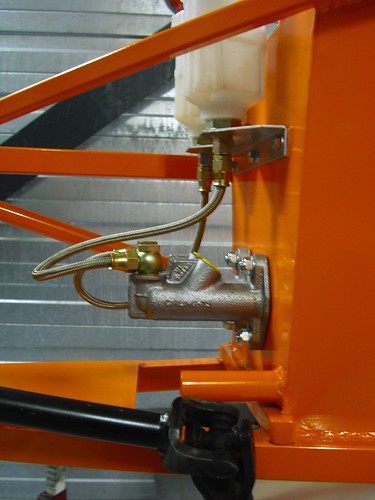
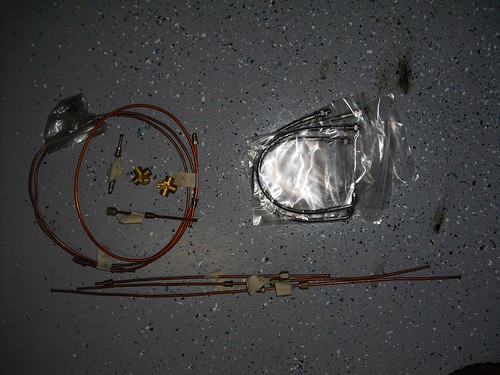
The brake line kit, this comes complete with flexible hoses, but they wont fit into my wilwood calipers so I need either new hoses, or an 1/8th NPTF->M10 Female adaptor.  

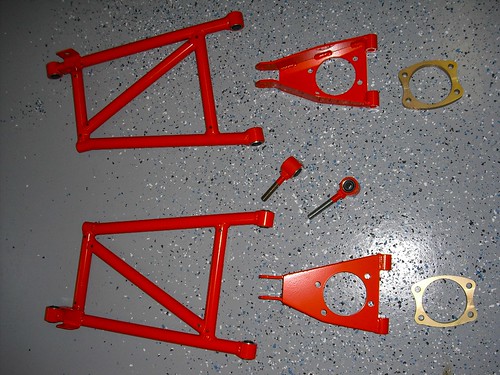
The lower rear wishbones, camber adjuster, uprights, and hub spacers.

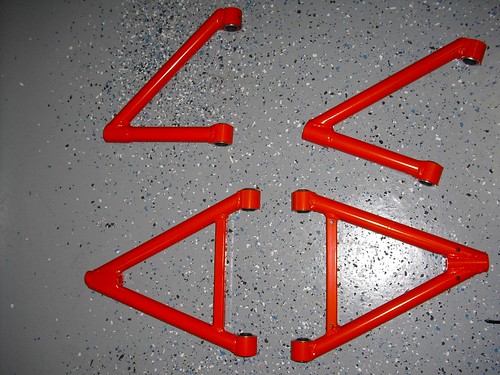
Lower front wishbones (top) and upper rear wishbones.

Pedals, pedal box, and steering components

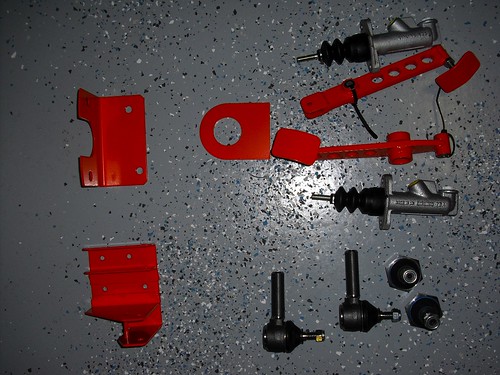
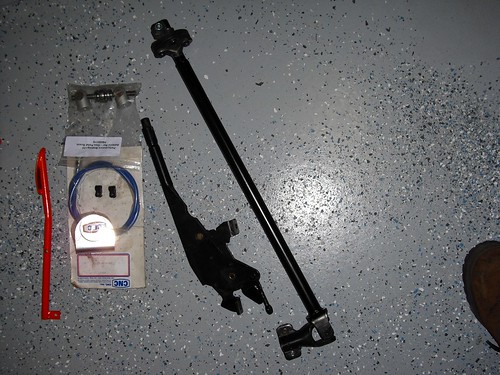
Modified hand-brake, steering shaft extension, accelerator pedal, and bias adjuster.
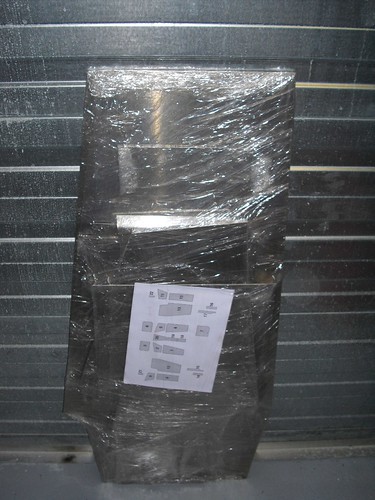
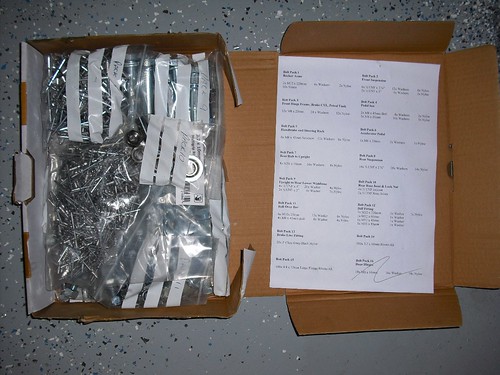
Nut and bolt pack.

Amongst other things, Chris also recommended Gerald Dale Motor-Sport to get my DCOE's setup on the seven, so I'll book a session soon I think.

Tuesday, March 3, 2009

Rear Differential

Fitted the differential, it was quite easy to get it into position, and the brackets lined up fairly well.  The nut and bolt pack only had bolts for the sierra diff, fortunately I had some 25MM M10 bolts.  The bolts don't have any lock nuts, so I've thread-locked them and marked them.  I've seen on Tim's blog that his came loose before, so I've also marked them visually so that it should be obvious if they are working loose.

Panelling the floor

Dry fitted all the aluminum panels.  The floor will have rivets every 4" along, and the other panels are riveted with 3.2mm rivets.  The manual suggests that the panels should be installed first, however I agree with Tim that these will only get in the way.  I have drilled, countersunk, and de-burred all the holes, test fitted the panels, and now put them safely out of the way.  I will refit the floor as its going to be hard to do this with the car the right way up.  The others can be fitted later.


4kam installation

I got myself a 4kam bullet camera to record better video in the car.  I installed one camera in the very front of the car pointing through the grill.  I tapped out the bracket in the polo radiator to m6, and mounted the camera through that.  It sits back a little from the grill and gives a good view of the road in front.

The second camera is mounted in the rollover bar, and can pivot to face front or rearwards.  Cables go through the transmission tunnel to provide power and connectivity.  I use a solid state recorder to capture the video at 520 lines.  The recorder can only take a single feed, so I have a switch mounted on the tunnel to switch inputs.  There is a microphone under the dashboard capturing sound, and ultimately I will plug it into the intercom.