With my first attempt, i didn't really have the time to think about the design, it had to be ready as soon as I could glue it together, so it was pretty much thrown together. With this attempt I wanted to design out the problems I had with the previous one, and also create a well designed dashboard for the car.
This time round I wanted to lay out the dashboard in such a way that the important things would be the most visible, therefore the rev counter is the nearest thing to my line of sight. Then (Due to the cost of speeding tickets) The speedometer, oil pressure gauge, temperature gauge, fuel gauge and ammeter (Not really needed but its nice eye candy.)
The first instinct when seeing a warning light come on is to look at it, so I wanted each warning light to be next to the relevant gauge. To reflect this, the shift light is next to the rev counter, and close to the red line. To make it look consistent i put the other warning lamps at the same position relative to their gauge. I put the indicator warning light next to the fuel gauge - I don't have a low fuel warning light - if i get really forgetful or too lazy i have a reserve tank anyway. There where two reasons for this, the first was aesthetic - a missing warning light would look a bit strange, the second was that with all the noise and other things going on around you, in a car like a seven it is very easy to leave the indicator on by accident and there is no chance of hearing the tic tic from the flasher relay.
I wanted a more clean looking dash/control area so i wanted rid of the column switches, also as they tended to get in the way of my fingers when i was spinning the wheel, so toggle switches are used for everything except the horn.
I wanted a consistent colour scheme - no longer constrained by the SVA requirements on pictures and tell tales, i decided on a green light good, red light bad approach. Things which are red indicated something wrong, like on the rev limiter, or no oil pressure. Orange lights are for things which may require attention - like I've left the indicators on, or the engine temperature is high (The cooling fan is on.) Green lights are notifications - lights are on, other eye candy.
For the most part I wanted to have the minimum I need, I wasn't going out to rival a japanese street racer, but I do have some eye candy. I use megajolt for ignition, so i decided i'd have a start light above the start button - I'm not sure why i wanted this, the practical reason is that sooner or later I'll need another light and in the mean time this is an allowable amount of tat. In a nutshell the megajolt lights up a green light next to the start button when the revs drop off. Its cheesy but I like it.
I bought a carbon fiber blank dash from Carbon Mods, I wasn't that bothered about the weight saving, but their stuff looks the dogs danglies whenever I've seen it on a car, so decided this was a good start. The price also should enforce that I take my time and don't screw it up on the first cut.
Having no power in my garage, and it being a way away from my house, i decided to clear out the basement and use that as my workspace. The first thing to do was try to get a clear space to lay things out on - i sanded down the desk a bit and made sure there was nothing there to scratch the surface as my previous dash had loads of chips and scratches from me being careless.
Just to make sure I covered the whole thing with masking tape, this not only stops the drill slipping and me scratching it with a knife, but also gave me something to mark out the design on.
First off I made a template from the previous dash board, this should ensure it fits snugly, and it allows me to get the holes for the steering wheel just right. I also marked out the line of sight and the steering wheel position so I nothing would be out of sight, and that the dip/indicator switches would be within reach.
I knew more or less how I wanted it to look, ignition/starter on the right, normal switches in the middle, and the gauges laid out in a sort of heartbeat shape with the rev counter and speedometer staggered off the horizontal center.
It took a bit of playing around with the height and angles to get the proportions right, then it was time to start cutting. I started first with the smaller gauges, I used a hole-saw for these and then a half round to bring them out to the required size. For the larger gauges I chain drilled using a 3-mm drill and then filed it out to fit.
Then I drilled the switches and lamps, and flipped it over for the wiring. I was never happy with the original wiring as there was far too much of it, and it was not really wired to fit the dash which meant it was a loosing battle to begin with, so this time, every wire is cut to size, and there are no wires there which are not required by the loom. I also used common earths and lives where possible eliminating the need for a dedicated wire for each item in many cases.
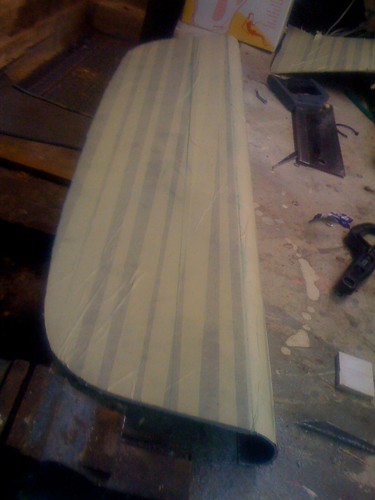
Cover in tape and cut it to the right size based on the old one.
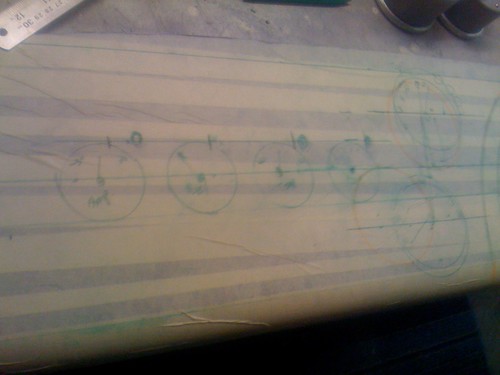
Mark out where things should go, i had to play around with the angles once i actually saw it on the dash.
 Using a hole-saw and then filing out to size I made the holes for the smaller 2Inch gauges.
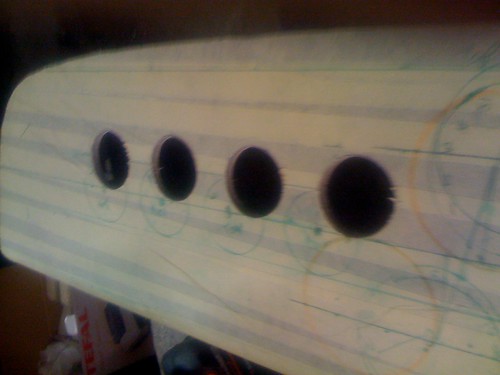
The larger guages where cut out using chain drilling then filed up to size.
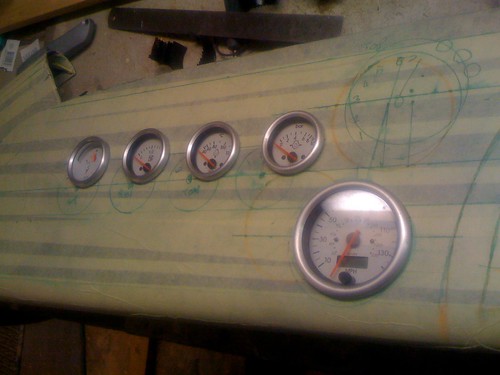
Starting to come to shape now, with a hole for the steering column to go through. On the right are the switches for ignition and start.

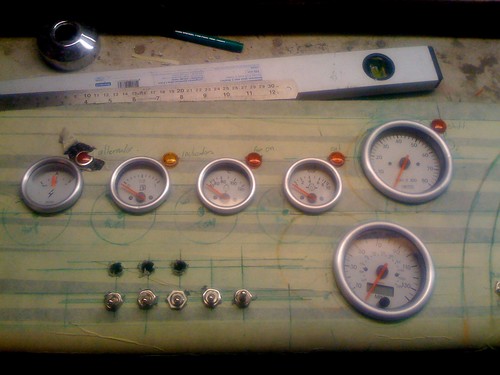
From Right to left - Tachometer, Speedometer, Oil Pressure, Water Temperature, Fuel Level, and Ammeter. Each warning lamp is positioned next to the relevant gauge, except for the indicators which is next to the fuel gauge.