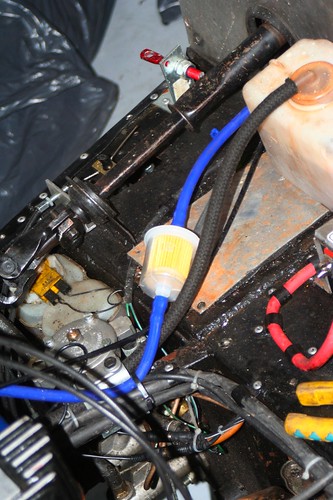
Tuesday, May 26, 2009

Minor Repairs and Upgrades

There are a number of minor issues I've been wanting to address for a while, since the last rolling road session where the coolant pipe split, I've been running with a far from optimal cooling pipe as its above the filler and needs a 90 Degree bend in it. I purchased a 90 degree hose connector, (its plastic but I've used these previously without any issues so here's hoping.) and plumbed it in again with the bleed tee just above the manifold. I was having issues with pushing out the fluid into the expansion tank and not sucking it back in, so i bought a new filler cap (Didnt solve the issue.) and I noticed that the fan wasn't working because the wire had broken at the earth point, so I replaced that too. I shall also upgrade to a profan just to be on the safe side, it keeps cool enough but i expect in really hot weather its going to struggle, especially in heavy stop start traffic.

Bleed Tee was above filler level

Temporary hose...

And got it as low as possible

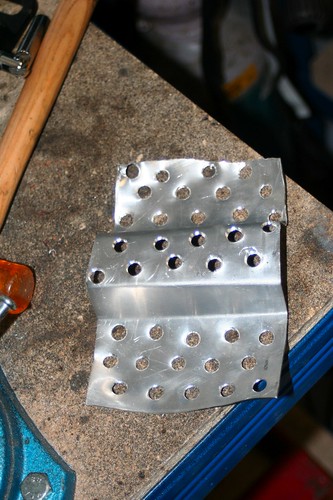
Final replacement, could benefit from a new outlet as the current outlet on the manifold is at 45Degrees where 90 would be better.

I bought a cheapo fuel filter to use as a plenum for the megajolt and installed that in preference to the walbro filter that I shall now use in the fury as originally intended.

The posh fuel filter was being used as a plenum

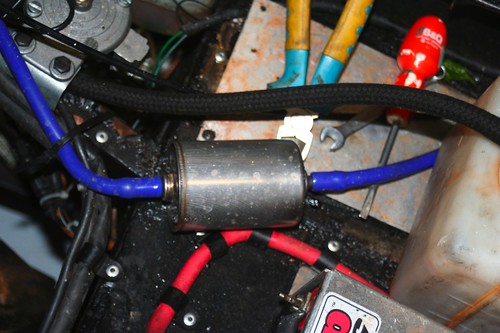
It didn't make sense to use this filter as a plenum as it was an order of magnitude more expensive than this one:

I need it for the Fury, so I swapped it for a cheaper one.

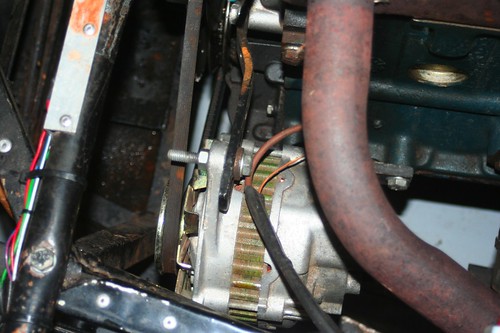
The spring had come off the throttle assembly, I expect I put it on wrong last time round and have refitted it, this time also with a cable tie so that it can't move around.

The spring came off, im not sure how but I expect it was incorrectly fitted.

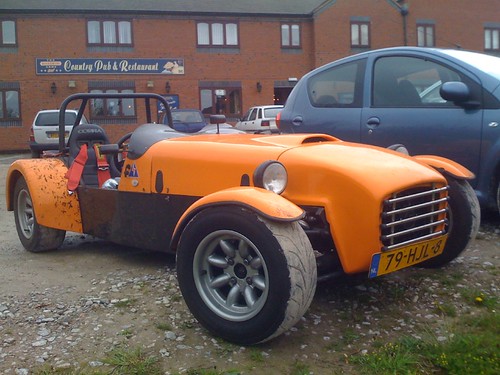
En-Route to stoneleigh I found out that the alternator was totally borked, no major casualties except an embarrassing stall on the M25 which led to some stress as it wouldn't start again, and of course a flat battery at stoneleigh. Mike sorted me out with a new one and its working perfectly.

The new alternator works well

There are a few minor things I want to resolve:

* Intercom, when driving you cant really talk with the passenger, and I'd like to be able to talk to Paul on the way to lemans. I have a starcom advance but the headsets are wonky so I'll get an aviation style one as well as an in helmet one, I'd like to use the ones from Peltor, but will need to either make an adaptor or just use the starcom ones.
* I broke an aerocatch (What is it with bonnets and alternators at stoneleigh?) and will need to replace it. I'd also like to put one in the top of the bonnet as it moves around a lot.
* I need to set up the brake balance better - its too far forward now.
* I also want to paint the inside floor, but now it looks like a farmers field.
* There is an oil leak either (hopefully) from the seal on the gearbox, or worse from a seal on the engine which I'd like to replace.
* On the more long term wishlist i'd like to shorten the steering rack to reduce bump steer, and put a quick rack in.

Despite quite a few rather annoying problems at stoneleigh, the car is running great. Paul and I covered some serious distance, in poor weather, on poorer roads (Single track country lanes.) without batting an eyelid, starting first time, every time. We both had smiles on our faces the whole time, and its surprisingly comfortable. We both gave it a pretty hard thrashing, On the way back paul asked what the red light on the dashboard was that kept flashing - I explained it was the shift light, but that didnt stop it staying on for extended periods of time. I turned off the A14 a good hour before Harwich and went cross country. You have to be seriously careful when driving hard as its a fine line between powering out of a corner, and powering into a ditch. The rear end kicked out a few times although very progressively, but I get the impression if you aren't paying attention it will really bite.

IMG_0827

Paul and I were really giving it some through the country lanes, the good news about slick derbyshire countryside is you rarely get the chance to go fast enough to get a speeding ticket, and despite the odd tractor and local, they are usually pretty quiet which makes for fun driving.

They are rather muddy though, and the car was completely caked, not to mention the occupants.

Post Stoneleigh Repairs - Cycle Wings

The wings on a seven are a constant headache, there are two common failure points, the first is the metal bracket which runs from the upright and holts the cycle wings in place. Due to bumps in the road, wind and air turbulence, stones and other objects being thrown up from the tires, rain and other debris vibrating the wing, the wing-stay is prone to metal fatigue. The common failure point is at the base where it joins the upright, and at the bend at the top.

The second failure point is is the joint between the wing which is fiberglass, and the stay which is metal. I opted to glue my wings to the wing stay, in doing so I drilled holes in the wing stay to provide space for the glue (PU Adhesive) to key to, I also made the fiberglass as rough as possible, however this started to fail.

Both sides have failed in the same way, the rear most glue has separated from the outside working inwards, the drivers side failed first. I noticed it as it was bouncing around on the way back to cambridge, I did my best to reduce the movement using some cable ties, and inspected the passenger side to notice it was also coming off although not quite separated.

Mudguards are always a weak spot on a seven

The simplest option would have been to apply more glue, but obviously over time this shall just fail again. I could drill it, however that has its own issues, you create a stress raiser that over time shall crack and fail. Instead I decided to reinforce the joint. I cut and drilled some plates from aluminum that match the profile of the inside of the wing, I then mounted these with PU over the metal wing-stay, subsequently there is a much larger surface area for the glue to adhere to. Should this fail in the future, it will be relatively easy for me to bolt the wing to the wing stay through the aluminum. I'm hoping the copious amounts of glue will also dampen some of the vibration (Much like a metalastic bush) and increase the lifetime of the rest of the wing stay. The issue is of course that repairing it now that there is no feasible way of separating the two parts is going to be very difficult.

This is what is holding the mudguard, the wingstay goes through this and this then clamps to the wingstay and the mudguard.

I removed the black plastic U-trim, i originally liked it, as it gave a nice line to the edge of the car, but its started to fade a little so I'll run without for now.

I'm hoping that these will be now a permenant fixture.

Finished by covering in adhesive and clamping in place until it set.

The car was caked so I gave it a wash and a quick rub over with some polish on the front bodywork where i'd been handling it a lot.

After a quick polish to remove my muddy finger prints, its looking pretty good.

Post Stoneleigh Repairs - Exhaust

I've been wanting to do something about the somewhat antisocial amounts of noise coming out the exhaust for a while. I actually really like the sound, its brutal, at tick-over it sounds just slightly angry, but when you hit the throttle its like you've opened pandoras box. There are a number of downsides to this however:
  1. You can't hear yourself think when idle, let alone when moving.
  2. Nor can you hear your passenger
  3. People who can't tell the difference assume your a chav.
  4. I Can't go anywhere near a racetrack
Something had to be done. I bought the original silencer from a chap off LocostBuilders who was (And still is) making them in his spare time. Its about the size I want and the quality is outstanding. Titanium baffle plate, and stainless steel other bits, I wanted to avoid changing it if possible, so decided to repack it.


I wasn't sure if it originally had any wadding, but it did appear to be getting louder so assumed 
that it did at some point. There are also rivets at one end, so thats a good indication. Doing some research, there are basically three possible things you can use to pack the interior of the can. The first is wire wool, being metal it has a fairly good lifespan, its fairly loosly packed, so should perform fairly well, but as a result provides the least sound deadening. The second option is much the same, only using a ceramic wool, this can be packed tighter and has better sound deadening, it also burns out quicker. There is also a matt which is wrapped around, this has better deadening but as its woven rather than loosely packed, has poorer flow.

I opted for a highbred form CBS, its basically a sausage shaped assembly, wrapped around a cardboard tube, the theory being you replace the cardboard tube with your baffle plate, and its easy to apply. It is made up of a layer of wire wool, and matting on the outside. It cost about twenty pounds and was money well spent. It didn't slide on how I expected, but it was trivial to assemble. First removing the canister from the car, I started by drilling the rivets and removing the baffle plate and tailpipe assembly from the canister itself. I took the opportunity to clean the carbon deposits from anything i could reach with an air gun, this was actually a bit stupid because it meant my whole garage was now covered in carbon dust and I couldn't find the dust masks so had to stop for a day until it cleared.

I then unwound the wrapping and wool from the cardboard and wrapped it around the baffle before re-assemby using 3.2mm rivets.

Whilst the canister was off the car, I also fabricated a stronger bracket for the canister itself. Currently it is mounted using a stainless steel clamp bolted to a rubber bobbin which itself is bolted to the car in shear. These are notoriously weak, and this is asking for trouble. The bobbin was in reasonable shape, with some cracking but it was pretty strong. I used a pair of mole grips to get it off as it was pretty tight, so I figured that makes it strong enough to reuse.


I cut some 4-mm aluminum angle bar down to 4-cm, and drilled, countersunk, and de-burred two holes to provide a solid mounting, and another on the other side to mount the bobbin two. I then drilled an additional hole in the chassis and inserted an M6 steel rivet-nut with some PU adhesive to try to seal it a best as possible. I drilled out the holes in the mounting to 7-mm, as my tolerances were not accurate enough to use 6-mm holes sadly, I mounted the bracket slightly lower then the lower chassis rail to keep the canister in pretty much the same location as it was and adjusted the position of the clamp to match the new mount.


The car is much quieter now, I can clearly hear the induction noise which sounds rather nice. The down side is I can also hear the other mechanical noises and now think the car is about to break every time I turn, brake, steer, hit a bump, rev the engine, engage the clutch, or anything that causes any minor mechanical noise. I'll need to desensitize to it again.

The fueling is now of course in need of some adjustment, so I'll book the session with Fred and see how things go. Before I do that I want to replace the bearing in the carb as its causing some free play in the spindle which manifests as an imbalance on minor throttle openings.