Friday, September 3, 2010

Rear wheel bearings

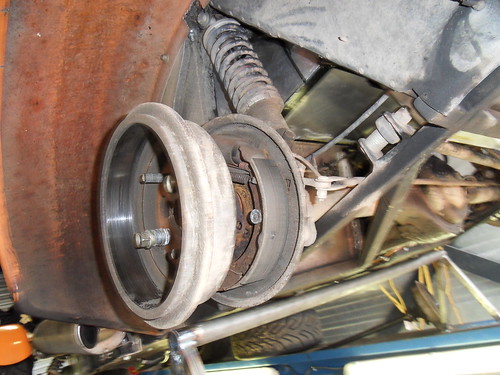
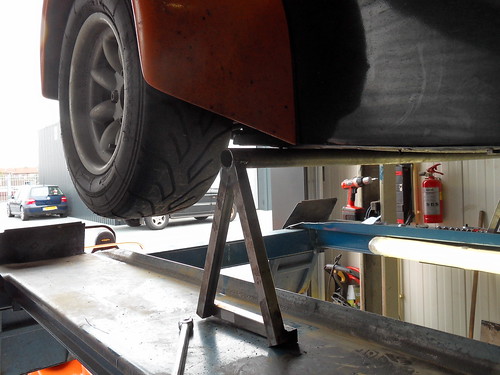
I decided to replace the rear wheel bearings on the seven as they were making a bit of noise. To make life easier i knocked up a stand for the rear of the car which means I can stick it on the stand rather than using floor standing axle stands or a trolley jack to support the car. This proved very useful.

Made a small stand to support the car on the lift.

The theory is you remove the hub, and undo the bolts that hold the bearing in place, and use a slide hammer to yank out the half shaft. Not having a slide hammer compounded this, but the first one came out with a few stern blows with two hammers on a back to front hub (providing me with something substantial to hit.)

Removing the rear half shaft

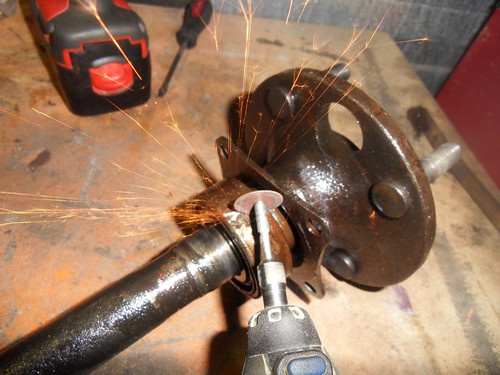
The other took many hours of smacking with hammers, chisels, heat and general swearing before it gave up. I cut a groove into the bearing itself, and then used a cold chisel to break it off, this worked pretty well. The new bearings are now ready to fit, and will get pressed into place by my local garage.

And corroded on, so it was easiest to cut a groove and use a cold chisel

Seven Trip to spain

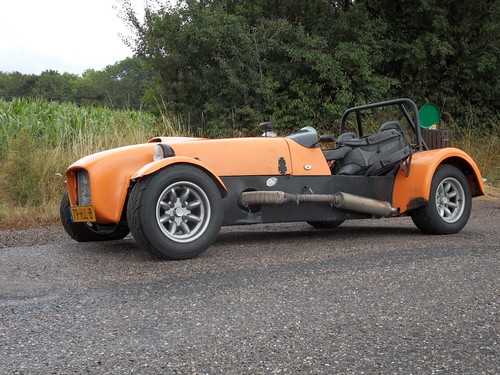
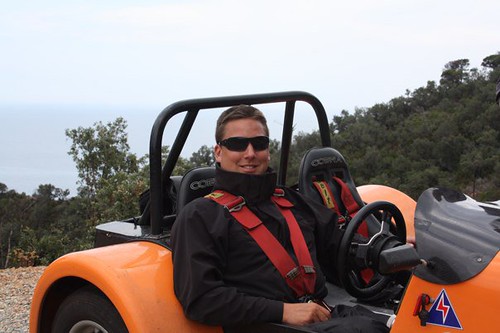
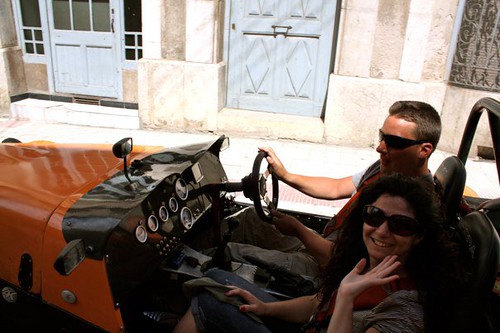
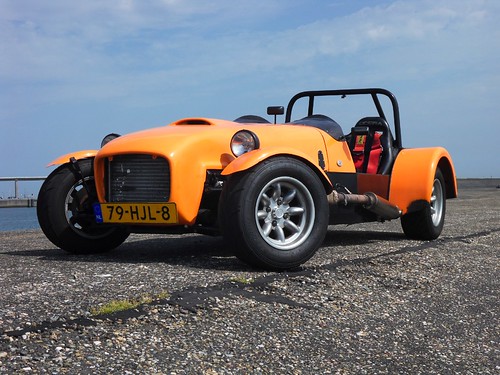
Not much driving weather this year, however I did manage to get a trip to spain with some friends, they were flying from all over the place, so I drove down through france on my own. The weather was forecast to be wet (Imagine my surprise) so I decided to take it easy over a few days as it can be pretty miserable driving when the water is coming in through the drain holes.

The rain held off long enough for a broodje kaas, and a well deserved pee.

The first day was mainly getting through the Netherlands and Belgium, which is miserable at best, but the rain was just damp rather than biblical, so quite good fun. Northern france got a bit wetter, but started to dry up by the time I got to Dijon. I had a bit of a moment when there was a horrible metalic noise, I thought at first the alternator had come off again, which was surprising as its threadlocked, and lockwired, but alas it was only the number plate which had come off at one side. I just undid it and threw it in the boot where it will stay for the time being.

I went through about half a litre of oil on the way to dijon, so apparently I still have a major oil leak out the sump. Grumble.


The next day was towards the Tarn, the morning was very wet, and very slow, but the roads were nice, and fairly quiet, in the afternoon it turned to random showers, and the scenery changed into some nice twisty mountain roads, i went over numerous cols, and found I far prefer the Yokohama A048 tyres over the Toyos, it just feels more planted.

The sun came out just in time for Mende, so I spent a few hours going up and down Cols and mountain roads, the car is really on form, traffic is minimal and i'm enjoying every second. I stop for some groceries, and go out for another our or so before stopping for the night in a camping.

The next day I followed to Tarn gorge, before heading up the side, and over the Millau bridge. At this point I noticed that the alternator output was lower than it should, and the ignition light was flickering. Having had an alternator fail a year ago I know all about the tell tales signs, but the ammeter was flickering all over the place. I also know that David ashurst has been plagued with ignition light flickering recently and that its caused by an electrical connection in the lucas plug. I pulled over and cleaned it up, and squashed the connector a little to provide a better connection, and the problem was solved.

Traffic was obnoxiously bad so I just followed the coast down to spain and then cutting off a pininsula and coming over an amazing bit of road into calonge.

38186_416027916490_602051490_5352970_7439480_n

The week was spent driving shorted distances over some great stretches of road in the costas, with a different passenger for every trip. The car was in great form for the most part, with a crack in one of the vaccum connectors forming and causing an air leak which was a bit of a pain for the rest of the day until I got back home and resolved it.

38342_416025036490_602051490_5352758_5182573_n

The way back I went pretty much dead straight home, doing around 130kph most of the way up the peage, everything was fine till belgium when I noticed a small water leak when refuelling, there was a pinhole in one of the hoses, so I just cut it off and shuffled it up a little which got me home. I also noticed the fuel consumption was up for the last tank, which turns out was a fuel leak in the tank (again) so I'll add that to the list of jobs to do which is currently:

* Adjust the position of the gear box so it doesn't vibrate against the crossmember on hard left turns.
* Fix the fuel leaks from the tank
* Replace the rear wheel bearings which are getting a little noisy
* Make the speedo work again.

Fuel tank and wheel bearings

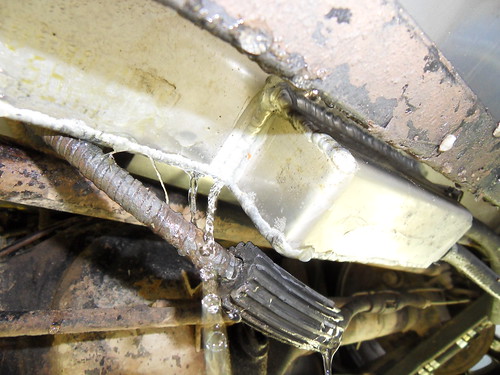
I've had nothing but bother with the fuel tank since I had it made to my design by a company in the UK. First they forgot the order, then when it finally arrived it leaked fuel all over the place, and to top it all they over charged my credit card by 100 pounds. I still haven't had a refund for the difference let alone the leak stopped. This all came to a head last week when I went out for a quick drive and could smell petrol. I turned around and went home, when I arrived I could see a steady stream of fuel dripping out the rear of the car, the weld had failed in the swirl pot.

SDC10426

I decided it was time to get the fuel tank out and fix it properly, before doing so I drained the tank and filled it with water, I could see it driping out of a seam at quite a rate. I took the tank out at this point (which requires dismantling most of the rear of the car.) and decided to pressurize the tank a little so i could find all the other little leaks too. At 5psi the tank burst along the top seam. The welds are terrible, and not very deep, which left a 9" gash along the top.

I didn't want to waste any more summer driving time, so I decided to fix it myself. I borrowed hans' TIG welder and set about learning to weld with it, its not easy, and for some reason I seemed to get electric shocks off the welder very regularly, but I did manage to get to the point where I could run a consistently deep, if not very tidy weld, so moved onto the tank. I welded in a bit of right angled aluminum along the top as the gap was too big for me to weld up again, and welded up the seam at the bottom of the tank all the way along. It stopped leaking streams but it still leaked a drop here and there at 10psi.

I've now sealed the tank with some Tapox tank sealer, so hopefully this should do the trick, over the winter I'll probably get a new one made up as I don't trust this tank any more.

Interior Finished

I finished the interior of the car this weekend. I was being held up mainly as I had to wait on some parts. I had to fit the on/on/on switch for the wipers, however in some fit of mouser madness I misread the part number and whilst it is an on-on-on switch, its actually not any use on its own, as its positions are Z+X X+A A+B which means I still need to use a relay. So I just broke, and wired up a relay that breaks the park circuit when the wipers are on. They wipe, and seem to do so pretty quickly.

SDC10444

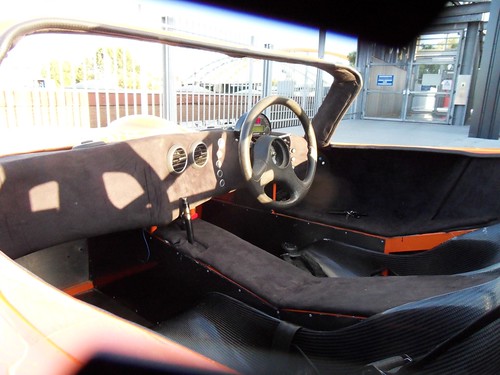
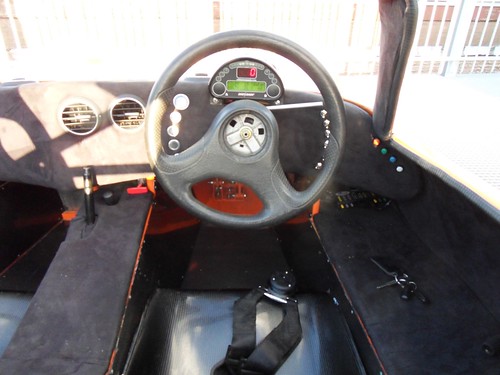
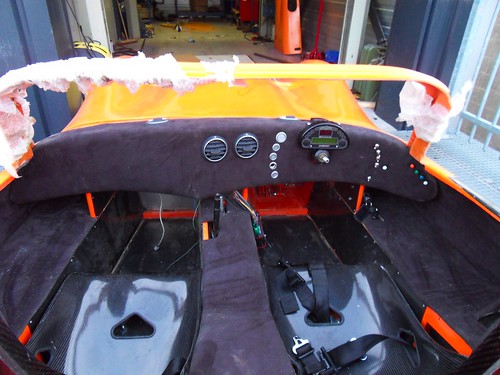
I fitted the replacement flasher, which flashes, and checked all the switches function as they should. They did, so I bolted in the dash, its pretty solid, and fits just the way it should. I think it looks really good, and am very pleased with the end result. It was definitely worth all the mess. I cleaned the interior with an air gun, hoover, and fabric cleaner, and routed the internal wiring, and stuck down the side carpets. The immobilizer stopped working because the sensor was too far away from the fob, so i need to move it somewhere else, but I'm not sure where yet.

SDC10446

I then trimmed down the seat belt tails to a more sensible size, i went for six inches past the buckle. Next up was to trim around the windscreen. My plan here is to use alcantara, with one edge tucked under the windscreen ever so slightly (should be fine since its bonded in place with copious amounts of PU) and the other is held down with some U trim which also puts the required radious on the edge of the windscreen surround. I then used contact adhesive in the bits in the middle, so hopefully it will all stay up there. It was fiddly and took forever, but looks pretty good now.

SDC10437

I bolted up the hideous sierra steering wheel, and checked everything worked, it did so had a celebratory drive around the car park, gear change is crappy since there is no tactile feedback from the lever, but this will be easily remedied post IVA. The car is pretty quick, first gear is pretty tall though, i'm hoping the 3.21 diff was the right choice afterall. The interior is now finished, I'll need to start covering it when i'm doing messy jobs to try and keep it nice and clean.

SDC10441

Friday, August 27, 2010

Floor Finished

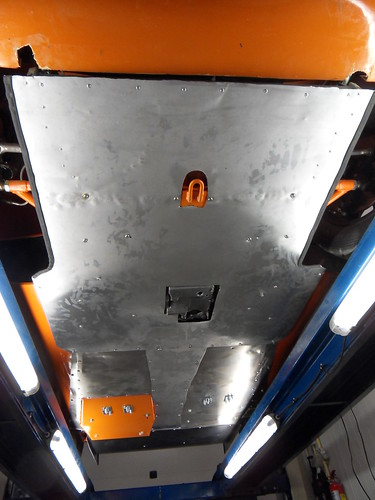
I fitted the rear diffuser today, it runs the full width of the car, and starts at the rear bulkhead running flush with the rear of the bodywork. Its bolted on with M5 rivet nuts, however as it should be an aerodynamic aid providing some downforce, i wanted to make sure it didnt flex. I've added three tubes bolted in place at the rear to pull down on the bodywork. The look is growing on me, at first it looked a little bit to MaxPower, but its wearing off. As it will count as above the floor line, it needs to have a radiused edge, so i've added some U trim to protect mr IVA man and his delicate little fingers.

Fully flat floor now in place

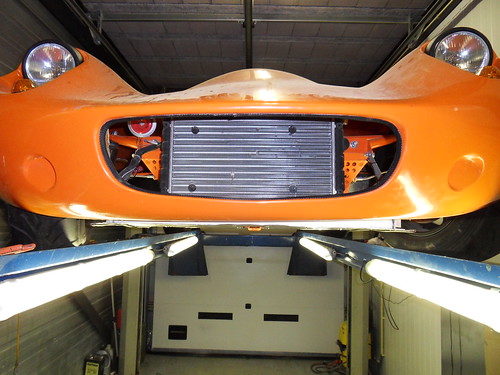
At the front I fitted a bit of right angle aluminum to eliminate the gap between the bodywork and the floor, you don't notice it, but I want to force air in the front of the car through the nose, not through the floor where possible. I added some U trim around the aluminum floor to protect me and my delicate little fingers.

SDC10394

I removed the sidepods and cleaned up all the dust in them, and bolted down the bonnet clips. It took ages to get a good shut line again after I put them on, so I hope I don't need to do this too often. The floor is now complete, and I think it looks pretty good.

Inside I fitted the heater hose, I then decided there wasnt enough air coming out the vents so added another hose at the other end which required some cutting and shutting of the fixtures and fittings, but now provides a bit of a blast when the fan is on.

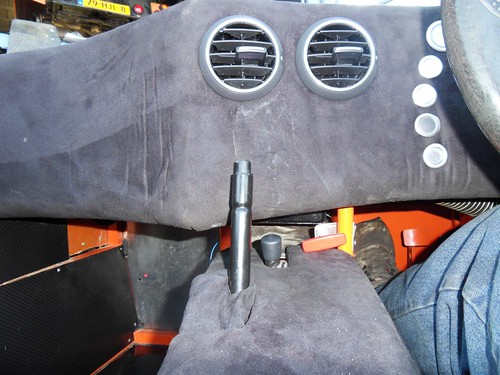
I added a T-Pull handle for the fire extinghuisher, its within arms reach under the center console, but well out of the way in case it gets pulled accidentally.

SDC10447

Friday, August 20, 2010

Wipers and Intercom

Fitted the windscreen wipers, these have a 95 degree sweep, so I've mounted the offside one just to the right of the steering wheel center, and the other about 5" to the left of where the tip of the blade finishes. Finding the position was easier than I expected, using a protractor and the arms and some tape I put them in various positions and checked that the were not missing anything in my field of vision.
SDC10373

Fitting the wheel boxes to the motor on the other hand was endless frustration. The theory is simple enough, there is a corrugated flexible bit of wire that runs through some copper tube from the motor to the wheel boxes, the wheel in the wheel boxes is turned by the teeth on the wire, the wire is pushed and pulled by a crank on the end of the spindle.
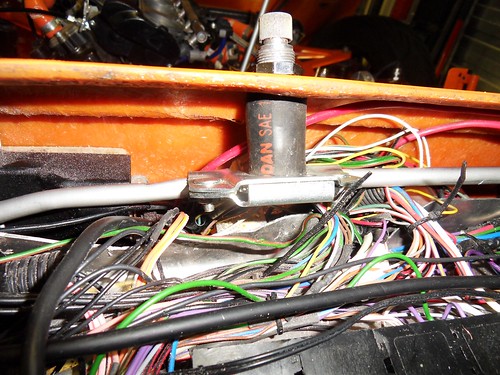
SDC10388

I measured and cut the tube, and used a mandrel to bend it into the right shape, offered it up to the wire, and of course, it didn't go in. The wire is about 8mm, as is the ID of the copper tube. I de-burred the edge, and tried again and it got as far as the first bend, where of course it was too narrow to go any further. I spent a good few hours trying smaller radius bends, before finding another roll of ever so slightly larger tube that allowed at least some movement.

I then flared the end, before noticing that i hadn't put the nut on yet, after remedying that I offered up the rather inflexible assembly to the wheel box. This is located under the windscreen, above the electrical tray. It fits in there with a bit of bending, but removing the nuts on the end require the patience of job. These nuts are used to clamp the copper pipe in place, the wire then goes through the wheel box, and into another section of copper tube. I spent a good hour wiggling, and eventually managed to get the wire to pass over the lip on the clamp, another eternity tightening it up, before i (thankfully) had the good wisdom to test it worked, because as soon as i pressed the button the fuse popped. Tried again with a slightly larger fuse, and it pushed the flare out the motor end, i yanked on the wire and it was locked solid.

I assumed this was down to the cable being crushed, but after removing it, it was obvious that you have to thread the wire through the wheel box, as there is not enough of a gap for it to sit home if you don't, so basically when i tightened up the clamp i was just locking the wire in place.

I decided at this point, that things were getting too complicated, so i decided to use 10mm ally tube, and move the motor inside the car to eliminate the need for tight bends in the tube, this should allow the mechanism to run smoothly as well as making it easier to fit.
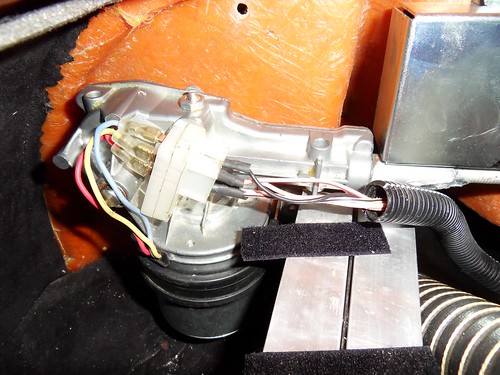
SDC10378

I drilled out the brass nut on the motor to 10mm, and put a flare on the tube, put the nut in a vice and screwed in an alloy boss which sits in the motor housing and is clamped in place by the cover of the motor. Of course i over tightened it and it sheered away in my hand. This was turning into a bit of a bodge, so after a bite to eat, i decided the best option was to make a new boss. (its simply a T shaped bit of metal with a hole in it) I did this by taking some alloy bar, turning it down so it had a lip on it. I then brazed the alloy tube to it using durafix, and some air of professionalism started to return to the finished result.

With it all bolt in place, the mechanism moves very smoothly, and is rock solid, which was pretty much what I wanted. I can now keep myself awake when i sit in the car by being slapped in the face by the wiper arm until I get round to sorting out a windscreen.
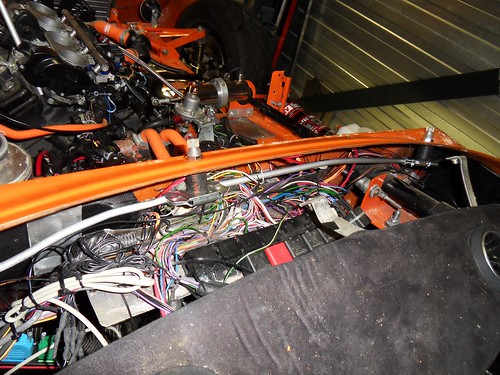
SDC10380

Next job was to fit the intercom. I've mounted it on the sidepod to my right, just at the end of my arms reach under the dash, to make the wiring tidier, i drilled a series of holes in the back of the casing and routed the power, and comms wires out there, leaving just the inputs for the music/gps etc at the front. The wires for the headsets will run along the outside of the sidepod to their rubber mounts.
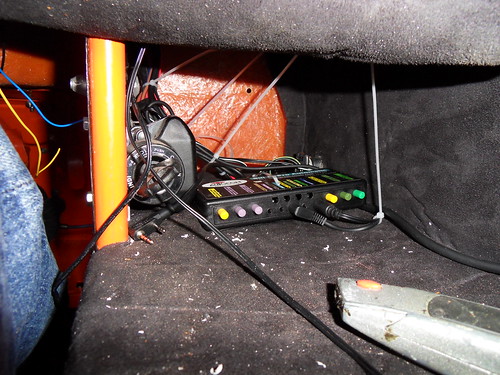
SDC10387

The side repeaters are also fitted and wired up, along with an indicator switch and working hazard switch (Using a conventional way of doing things.) which will do until SVA, although for some reason my flasher wont flash, i tried a different flasher, and it flashes, but at the wrong rate due the LED lights, so i've ordered a replacement LED flasher unit.
SDC10412

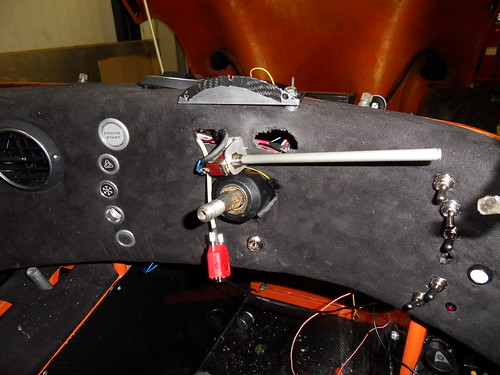
I made a very crude, and tbh not very good shift lever by extending a momentary on toggle switch with some alloy tube, this will do until I get rid of the ginormous sierra steering wheel (Post IVA) and can fit a proper flappy panel wotsit behind the smaller momo one.
SDC10384

Fury Todo List

Its mainly little jobs now, in no particular order these are:


  • Interior
    • Fit the dashhboard
      • Mount the dash
      • Mount the T-Pull handle for the fire extinguisher
      • buy and fit a working flasher relay
      • Fit (Temporary) buttons for dip/mains and horn
      • Make and fit temporary shift lever
      • Fit the heater hose from the dash to the heater
      • Fit the heater hose from the heater to the driver footwell (Exhaust should keep the passenger warm.)
      • Fit a working switch for the heater fan
      • Fit the intercom
      • Order and fit switch for wipers
    • Stick down carpeting
    • Carpet around the windscreen aperture
  • Engine:
    • Make an airbox to get through SVA
    • Adapt existing air filter to sit 180 degrees from its current location and make hole in bonnet
    • Remove AIS system and turn it into a breather system
    • Order and fit a catch tank
    • Change the O-Ring on the sump for a yamaha part
    • Order and fit alloy tubes as current ones seem to be porous
  • Bodywork:
    • Glue rear lights in place
    • Use some PU to fill any gaps
    • Fit front air dam
    • Buy and fit some mirrors
    • Wash clean and polish
    • Buy and fit rear diffuser
    • Fit side repeaters
  • Windscreen:
    • Buy and fit windscreen
    • Fit windscreen wipers
    • Fit washer nozzle
  • Brakes:
    • Set the brake bias
    • weld up the bias bar for IVA
    • Remove the bias bar adapter
  • Wheels
    • Balance the wheels as a couple of the sticky weights came off
    • Fit all the wheel nuts, and cut down the front studs if required
  • Suspension
    • Book and appointment to get suspension set up and corner weighted

Bonnet pins and rollbar

Bonded in the bonnet pin mounts to the side pods, but i think it will need to be bolted, i'll bolt them in at a later stage when i have a good reason to faff with the side pods.


Put a final coat of black on the roll bar, and bolted it in only to find out i'd ran out of m10 nylocs, managed to find one, which is enough to hold it in place, with the other bolts just screwed into nothing. Will pick some up on Monday and finish the job.

This didn't stop me from adjusting the harnesses and fitting them, with the adjusters in the right place they are a lot more comfortable and of coarse, a better fit, whilst very comfortable the seats are tight to the bone, to the point i can actually feel the seatbelt through my jeans. Must lay off the pies.


I spent the rest of the evening tidying up the garage as i hadn't really put anything away since before I left for spain. The seven needs some post-trip-love, or at least a wash, so i might try to get started with that tomorrow. Its dripping oil on the floor so i'll put of washing the floor (which is now a little slippy) for a bit longer, or until i slip and crack my head properly.

Next up in the fury is to finish of the electrical parts. Until I can get a circuit board manufactured for an affordable price, i'll use a normal toggle switch for the indicators. The hazards need to work with the ignition off, which presents a problem, with the ignition off, and key removed, i can turn on the hazards, this is run from a permanent live feed. However, the indicators, work from the ignition feed. If i have the hazards on, and turn on the indicators then the ignition circuit is live too as power can flow back up the feed from the ignition circuit. I'll put a nc relay in there to cut the power for now. I also need to find myself an on-on-on dual throw toggle switch for the wipers, for now i'll just leave the wires ready to attach.

If all goes well with the wiring i'll have a go at fitting the wipers.

10% of the progress, 90% of the time

I'm down to the predominantly little jobs. I picked up the shifter arm when I was last in the UK, so I fitted that to the flat-shifter solenoid,


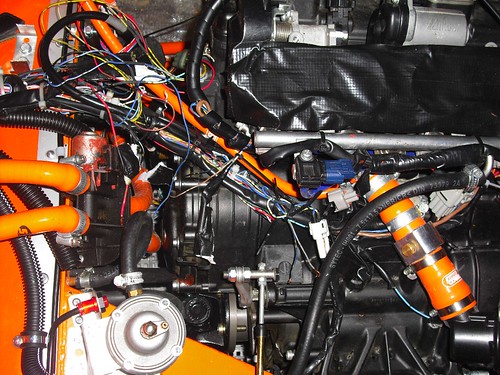
I need to finish the wiring, and there is now nothing in the way of this, so i've been out with my soldering iron, loom tape, and zip ties. The engine bay is now complete, with the flat-shifter-max wired in, and connectors ready for the rest of the flat-shifter post IVA.

All the engine loom is tidied away nicely, however I think i will need to make a support for the bike loom as its a little too short to sit on the bulkhead nicely.


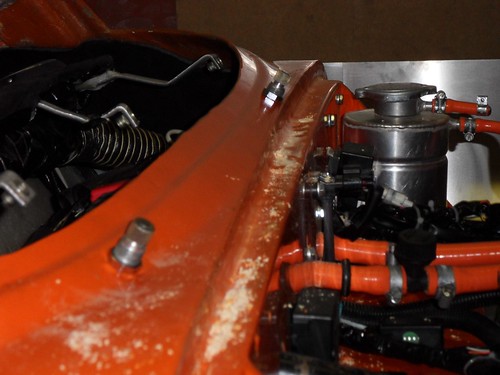
Next up was the bonnet catches, these are aluminum cases with locking pins, these look pretty nice, and are strong enough, however the bonnet has a pretty poor fit around the side-pods, as the pins are not locked, I think they may end up coming loose due to the side pressure.

To stop this happening, i've bonded and riveted in some plates to the bonnet, the plates have a pin in them which goes vertically through the side pod, this keeps the bonnet in place horizontally, whilst the locks keep it in place vertically.


Next job is to fabricate the mounts on the sidepod that secure the bonnet to the car.

Sunday, August 1, 2010

Trip to Zeeland

It was sunny so I went for a drive in the seven with tunerstudio running to see if I could improve things, I couldn't but the drive was lovely.

SDC10193

Basically, there is not enough variation in MAP pressure, and the rate of change is very steep off idle with no change at higher rpm. This means that the VE table is pretty flat.


Subsequently, I changed over to TPS based fueling, the result is a much more responsive drive, throttle response is like lightning in comparison, and it feels and sounds like its set up properly. The AFR is much closer to the AFR target. I've only ran autotune for about an hour or so on what was a relatively quiet drive, so the edges are not tuned yet, but for the most part its pretty close. Its certainly very drivable


Whilst I was trying to get Alpha-N working I hit a few idiosyncrasies in the tuning software. There are three fueling options for megasquirt: Speed Density; (MAP Based) Pure Alpha-N; (TPS Based) and Blended.

For now I'm using Pure Alpha-N, however when I set the fueling algorithm to Alpha-N in either tuner studio, or megatune it was still using MAP for fueling. For whatever reason it was using the blended algorithm. This seems to be not a bug, but slightly misleading name, Pure Alpha-N is essentially blended, but starting with Alpha-N rather than MAP. Therefore I set the Threshold to 9k in the Alpha-N blending dialog.


In addition, I had ego correction active at idle, this results in an idle which falls and rises all the time, setting EGO correction to be active above 1200 worked a treat.

Seven engine rebuild (again)

Well after a disasterous start to the year, it was time for a new engine. The root cause of the failure was the lubrication system possibly caused by a blocked oil cooler.
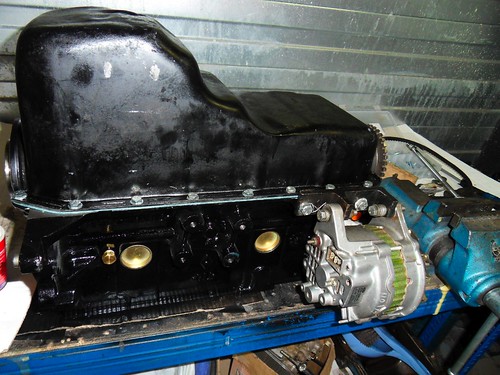
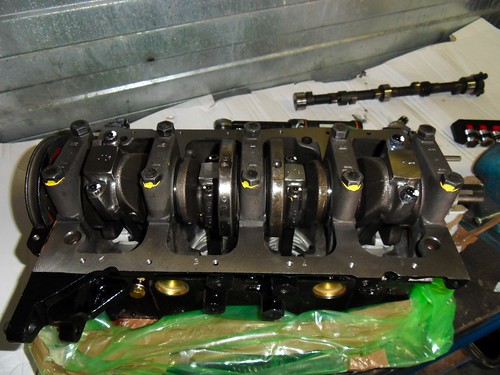
I got a short block from Jem Engines, its a 711 crossflow bored out to 1700cc, with fully balanced internals. The engine is fitted with ARP con rod and fly wheel bolts. I reused the Kent 244 cam, and burton stage 3 head.

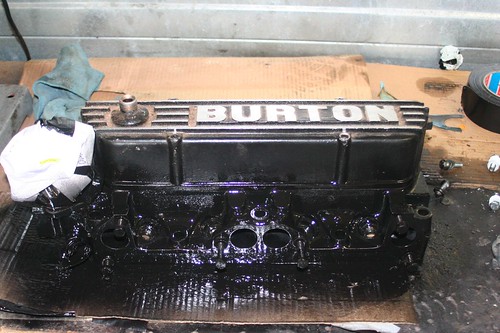
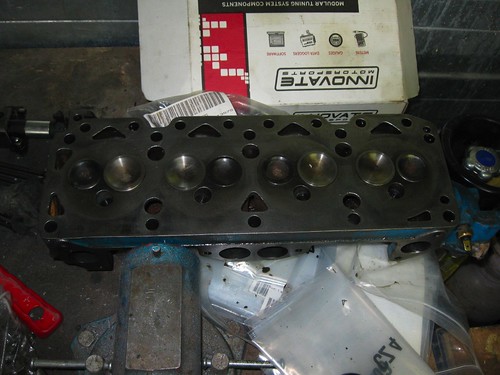
The first thing to do before building anything was to thoroughly clean the head, as the bearing failure had likely resulted in a lot of crud going around the engine, I stripped it completely and used pipe cleaners to go through each oil passage, and cleaned it with gunk degreaser and compressed air.

Afterwards I painted it black (it was blue) to match the block. I used hammerite and so far it seems to be doing the trick.

IMG_1406

Next was time to do the ARP bolts, Eric gave me some ARP Lube, so I torqued them up to 40 ft lbs.

SDC10137

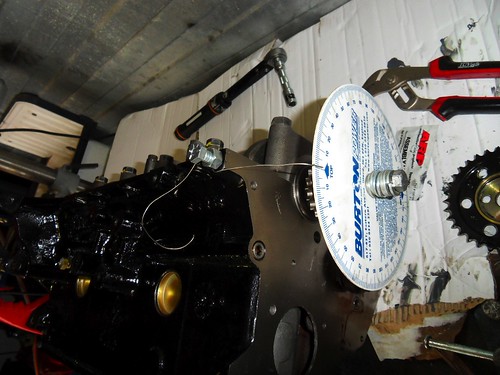
I can build a crossflow in a couple of hours from memory alone now, I could even remember the number of degrees to set the cam to, although this didn't stop me from making a hash of it the first time and having to re-time the engine after everything was built up.

SDC10141

I used a competition gasket set from Burton, Eric recons the best way to get a dry seal on the sump is to evo-stick the gasket to the block, then use a little blob of silicon around the rubber seals on the end, and tighten it up gently.

SDC10144

I tried this, the result was an enormous oil slick on the garage floor after the first drive so I'm back to experimenting with silicon... The engine was back in the car in less than 4 hours, ready to start, or so I thought.

SDC10145

It fired up first time, but made a noise that left me clutching my wallet.


It turned out that the oil pipe was ever so slightly grazing the con rod bolt, this thankfully was easily fixed with a gentle tap from the hammer and it finally ran smoothly. Getting the sump off in-car is a real pain, however if I loosen off the engine mounts and replace the gearbox->engine bolts with longer ones, I can use a crow bar to seperate the engine from the box about an inch which is enough to get to the rearmost sump bolts.

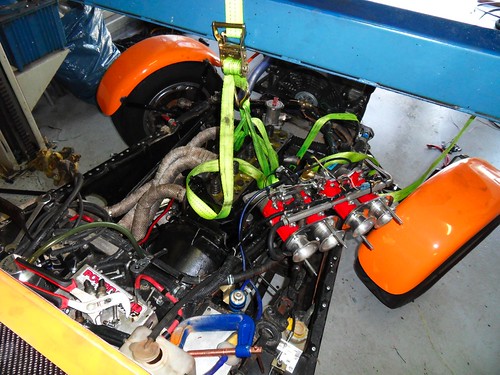
The fury lives

After two destroyed wiring looms I finally got the engine wired up properly in the fury. The trick is to completely ignore the wiring diagram in the owners manual.

The first time, I wired it up based on the colours and connections indiciated in the manual by shortening the loom, and things were very confused. After an enormous amount of faffing i got the ECU to intermittantly function.
The initial loom from the R1
The second time I got exactly the same results but with no functionality by wiring it directly from the wiring diagram. The reality is that there are quite a few additional connections, earths, shared VRef feeds etc, that are not indicated on the diagram, as well as a few circuits for the ECU that are simply missing, immobilizer for example.
CIMG0726
What I did in the end was wire up ll the sensors, get the ecu to report fault codes, and work as expected, then on at a time removed things that were not connected up to anything. This left me with a minimal loom, including relays, fuses etc. I then followed each wire to the fuse box, and cut it at the fuse box end. The cut wire was then re-routed, and extended/shortened as required to the engine feed wires.

Each time I did this, I turned everything on and made sure that things were still functioning, this made it easy to find any problems if I introduced any.

The result is that I now have a handful of wires coming out of the bulkhead to power and control the engine, these are tidily spliced into the engine loom which also goes through the bulkhead to the ECU.

The end result was that I could start the car, it fired up first time, with no fiddling which was just what I'd hoped for. I let it tick over for a while checking for bad sounds, leaks and any problems.

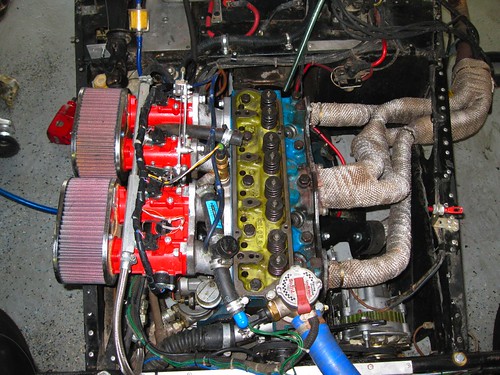
Things got pretty smokey as the heat wrap burned off all its chemicals, but settled down nicely, the side pod gets pretty hot, above the manifold where there is no heat shielding, but stays pretty cool everywhere else which I hope will be fine. I think I will make another hole in the rear of the pod to let the air out when driving though.

Hans came over so we fired it up again and had some fun with the loud pedal.


Since then I've taken it for a quick spin around the garage car park, this is going to be great when its on the road.


Sunday, June 6, 2010

Fury Progress

Has been slow, lots of things getting in the way of moving forward, engine wiring has stalled, i can't seem to find a fault, and am wondering if its the ECU. I also have an oil leak (Joy) from the o ring in the sump, so that needs to come off and be fixed.

I've been trying to get little jobs done, but have been plagued by broken parts, wrong sizes, shorts, the seven has current priority, but am aiming to get going again in a month or so. I am making progress with the dashboard though.
SDC10158

Mallory Six Hour

Despite the seven going belly up en-route, we entered the Mazda, it was pretty good fun, we were doing 1:9s-1:11s with Edwinas, and my lap times were consistent throughout. Paul had a small off, failing to turn left into the Edwina chicane but didn't clout anything which is the main thing.
The car held up ok, however post Cam belt change the (new) fan belt gave up after 2 hours and we had to repair that, and a split hose which cost us about an hour. In the afternoon the rear tyres were off, so we rotated the inside and outside rears which made the car much more drivable.

People were very friendly and we got a lot of encouragement throughout the day. We were pretty fast through Gerard's, but just didn't have the power to get the speed up the hill towards the hairpin, so we did find ourselves out-braking people into the hair pin, being overtaken down the hill, then overtaking them again round Gerard's which made things pretty interesting.
Lotus had a clear win, with some good driving and team management. We were the only mx5 to finish (out of 3 starters) and came mid way up the finishers which was good enough for us. In all honesty i was just glad we didn't bend it, or worse, vomit in our helmets like some copilots.

Houston, we have a problem (Twice.)

Despite being thrashed incessantly for 4 weeks through morocco resulting in only self inflicted trauma, the seven has now left me stranded by the side of the road twice in 3 weeks. The first through a head-gasket problem, the second due to something big going bang.

The end result is that the block, crank, rods and head are back at Jem Engines, where they will be cleaned, bored/ground/skimmed and balanced, before being sent back for the final build. In preparation for the six hour at mallory I thought I should try to put as many miles on it as possible, sadly following the two dry days in March, there hasn't been much dry weather in Holland since which meant getting out in the car has been difficult at best and not possible the rest of the time.

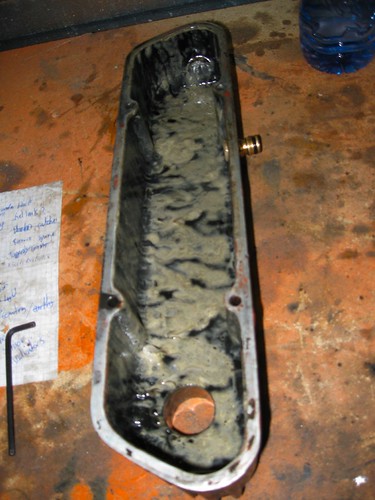
The rocker cover was full of sludge.

The weather in Western Germany, and Luxembourg was due to be not-wet, so off I set, laptop running auto-tune in the passenger seat, following the Waal/Rhine over the border, then heading cross country towards Trier, the TomTom provides a lovely route, (Set max speed to 40kph) about 4 hours into the drive, somewhere near Aachen, I came into a small town and as I slowed down into traffic, and up to a red light, i noticed the engine was stumbling a little, queue comedy smoke screen as the revs fell to idle and i had to nurse it to keep it from cutting out.

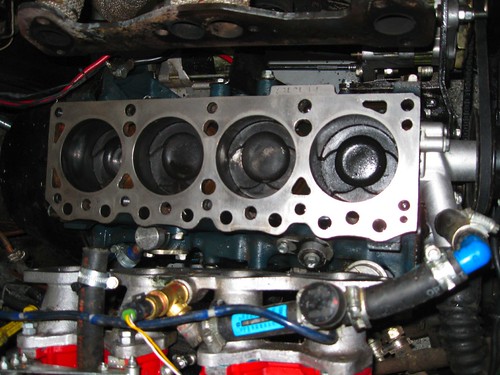
The block got the same treatment

I could feel my hand rushing towards my wallet as I thought of all the possibilities, but when i realized it was just a head-gasket, my next thought was to get it to Holland so I could be recovered directly home. I was about 60km from the dutch border, so I hopped on the Autobahn direction Maastricht and hoped for the best, about 5km later the temperature shot up, so i pulled off, cooled down and poured in 3 liters of water, queue more comedy smoke at idle, but was fine for another 38km where i had to do the same again (Thankfully, i was feeling thirsty earlier.) I made it about 10km over the border before it was out of water again, and managed to pull into a service area to call the ANWB.

The end result looking quite shiny

I then spent 4 hours waiting on the ANWB, who got lost, then sent a guy that couldn't tow it, who got his mate with a beaver tail that didn't fit the car..... In the end it made it on a flat bed, after my ordeal by the side of the road, I was only just able to cope with 3 hours of dutch country music in the truck home.

I put on the manifolds whilst i waited on the bolts to stretch out

The gasket had failed, and was repaired the next day. The following week I was due to take it to the UK and park it up at Paul's house in preparation for Mallory meaning i could fly in in Thursday night, get in the car friday, and all would be fine. I set off, everything was going well, then on the M2 I noticed oil pressure was a little lower than normal, I assumed it was just the thinner oil i'd used post-head gasket, but pulled over to check there was still some in it, there was, so off I set again. I got to my favorite spot on the M25 when there was a funny noise, the engine changed pitch, and overheated whilst i did a 4 lane dash, at this point i noticed i barely had any oil pressure and had that sinking feeling.

I ditched the car, and spent a long time on the phone to the ANWB to try to get recovered, in the mean time i noticed that i was getting enormous blow back out the crank case breather, this was going to be expensive.

The car was then recovered and despite every mechanic trying to tell me it was the fuel pump, or a wiring fault, despite me explaining that this thing called an immobilizer was cutting the connection because they hadnt wiggled the fob.... Its back in holland now, there is a lot of metal floating in the sump, so it looks like a bearing had failed either as a result of low oil pressure, or possibly the root cause. I'll continue stripping it down and hopefully figure it all out soon.

Friday, April 23, 2010

APK and Gaskets

The seven sailed through the APK, more or less at TheFritz.nl. The CO output at fast idle was a little over, so i adjusted the load bin down in the megasquirt. He asked if the noise at the rear was the wheel bearing, but its just the noise the diff makes and he was happy with that. I demonstrated that there was really no play in the wheel, and that it turned freely.

He pointed out that copious oil was dripping out the car, whilst this isn't an APK failure, its bad for the environment and can get me fined. I obviously don't want an oil leak at all, for a whole host of reasons. I explained it was from the rocker cover and i was having lots of problems with it. A few minutes later he emerged behind the counter with a carpet tile and said this will work.

I cut it to shape, and sure enough, it seems to do the trick. I noticed a few spots on the floor still, so i think i still have a leak somewhere, but its nowhere near as bad as it was, and it certainly isn't from the rocker cover or the breather pipe now.

Monday, April 5, 2010

Crossflow Rocker Gaskets

I think I finally found the cause of all the oil leaking everywhere. It seems that its pouring out of the rocker cover flange. I have an alloy one, and its always somewhat awkward to fit it. There is a cork gasket which invariably isnt quite the right shape, when its tightened up, it has a habit of being squeezed out.

To make it easier to fit, I usually use copious amounts of loctite gasket sealer which bonds the cork gasket to the rocker cover, making it easier to assemble. It seems that this is still not good enough, I've always been aware of a small amount of oil on top of the inlet manifold, which I assumed was mainly runoff from when I'd filled it, however on closer inspection there is actually quite a lot of oil running out and down the block.

I've since dispense with the cork gasket all together, and cleaned the alloy back to bare metal. I've applied a fair bit of loctite 5922 flange sealer, hopefully this will be the end of the leakage. On a better note, this seems to be the only leak that I actually have, although its hard to say as it gets everywhere.

Saturday, April 3, 2010

Engine

I thought I was all set to start the engine in the Fury, the last time I did anything with the engine, i was unable to get the expected output on the original bike clocks. I put it to the side as actually starting the engine was a long way off.

Since then I've plumbed the engine, and lengthened/shortened the loom to fit the car installation, the prop shafts are connected, the wheels are on, and the controls are connected up. It was time to have a go starting it.

I put the engine fuses in, filled the engine with 3.8l (Total oil capacity according to the service manual) and wired the bike clocks up permanently, it took a while to work out which wire did what for power and earth. It immediately registered a few error codes, i reduced this down to one for the EXUP motor, which i am not using.

I turned the engine over, and the digi dash registered a tach signal, and the injectors were firing, and the fuel pump was running when turning over. The engine had oil pressure, it was time to start the car.

I pushed it outside, filled it with fuel, and went to start it up, for some reason the bike dash was no longer displaying any error codes, and i had no sparks, no fuel pump and no injector firing. I spent the rest of the day trying to find the problem, it seems to be related to the wiring, and the relay box. I think the fault is somewhere between the ECU and the Relay box, related to either the immobilizer, or the relay box itself. I think the ECU is not receiving any indication that it should run.

I also found a minor wiring problem, in that i'd wired up the connection between the ECU and the #1 injector to the ignition live. They both use the same color wire. It does make me worry what other mistakes i've made though. I also noticed that I could hear a relay clicking when i leant on the wiring loom. I expect that this is probably the root cause, and is either a break int he wire, or an intermittent short somewhere.


Little Jobs

Its been a whilst since I posted, lots of non-car related things going have kept me from posting progress. The car is nearing completion now, my current todo list is:

Seven:
  • Paint metalwork at front of car
  • Fix the oil leaks
  • Fit the additional return spring on the throttle
  • Check the exhaust fittings for leaks
  • Check the state of the exhaust wadding
  • Make a new boot
  • Make a floor for the boot of the car
  • Check if the fuel tank is actually leaking or if its just overspill from where i was careless.
  • Set the Timing
  • Adjust the tappets
  • Remove the foam from the underneath of the bonnet
  • Remove the old fuel filler, fill the hole and paint it
  • Rewire the tachometer to work with megasquirt
  • Paint the aerocatches black


Fury:
  • Fit the trim to the windscreen
  • Fit the flat shifter kit
  • Fit the battery holder
  • Make a bracket and fit the speed sensor
  • Fit the indicator side repeaters
  • Fit and wire in the IR beacon for the data-logger
  • Fit the warning LED for the immobilizer
  • Sort out the heater ducting
  • Adjust the headlamps and fit the cowling
  • Connect up the earth for headlamps
MX5:

  • Change the oil
  • Change the cambelt
  • Flush the cooling system

Saturday, January 23, 2010

Wiring

So, to finish the car, I 'just' have to:Fit the windscreen wipers, and windscreen
Fit the gauges, switches, vents and dashboard (all part of the same job.)
Fit the rear lights
Make an under tray and flat floor.
Powder coat the rollover bar (Painting this has been a series of disasters.)
Wire the whole thingFill with oil and waterStart. Drive. Smile.

The windscreen and wipers will be the last thing I do, as it will restrict access to everything else once it is in there. Rear lights are on order, and im still deciding over the gauges and layout of the dash, so the logical thing to do now is the wiring. I'm going to make my own loom, although there are a few off-the-shelf options that are very appealing. Premier Wiring make a great Lucas based loom, Alan the chap who runs Premier Wiring will do more or less any length/combination of clips etc, but there are a few fundamental things that are suboptimal about the loom. Mainly the proportions aren't quite right for such a small. I always find i'm
cutting out things and faffing around to make it tidy. For the money though, the quality is outstanding and its very well made.

Stafford Vehicle Components also do a 'Rapidfit' Loom and some others, these are more expensive versions of the Premier wiring loom, and whilst these look well made, ultimately are not going to be quite what I want, especially as I'm aiming to save weight, and have some specific requirements for lighting and accessories such as camera/intercom etc which all must be powered and require non-12v feeds.

The front of the loom will be supported by a tray underneath the dashboard, this will keep everything tidy. Instead of fuses I will be using circuit breakers, I hate fuses, they have a really annoying habit of blowing when i've run out, and I find them generally fiddly. Circuit breakers work pretty much instantly, which is also a good thing, but can also be reset easily and give a clear indication that they have tripped which makes fault finding simpler. Where possible I shall use Lucas color codes.

The main power control is via an FIA master switch close to the battery, this feeds the ignition key which is the main on/off switch for the car. I will fit this after IVA.

The IVA requires that the side (Parking) lights can be on with the ignition off. In order to remove any ambiguity over what qualifies for the Ignition, I shall remove the FIA master switch for IVA. Some cars disable the headlights when the ignition is off leaving just the sidelights on even if the dipped headlights are still switched on. This is handy as it means you are less likely to run the battery flat if you leave your lights on, but the simplest way is simply to wire all lights via permenant live.

I am using toggle switches for primary light control, these are rated to at last 24 Amps at 12V, this means I can power the lights directly from the switch. However I'm using a momentary on push button and a bistable latching relay to control dip/main beams. This enables me to have a button on or near the steering wheel so that I can dip the lights quickly when driving at pace without moving my hands from the steering wheel.

The push button will also flash the main beams if the lights are not switched on. There is no requirement in the IVA for this, however it is my personal preference.

I'm doubtful if the generator on the bike engine will be able to cope with driving lamps, however I will wire these in regardless. (I want to avoid splicing circuits at a later stage.) This will be done through an off/on/on toggle switch. When set to off, the driving lights will remain off regardless. When set to position 1, the lights will illuminate with main beams. When set to position 2, the lights will light when the dipped and main beams are on. The load from these lights in combination with the headlights may be too much for a toggle switch, so I shall wire these through a separate r
elay.

The IVA states that the fog light must come on when selected and when the dipped or main beams are on, it is wired through the main lighting circuit, there is no need for a relay for this.

Brake and reverse lights are wired via the ignition switch.

I'm using a lower power, constant rate flasher unit, this has a feed from the permanent live, and goes to the indicator control box, which i've designed to use single push buttons on the wheel. the control box also controls the hazard waring lamps, which must work with the ignition off.

There are separate circuits for comms/cameras, auxiliary devices (both perm and ign live) dashboard electronics including heater/fan, windscreen wipers, and the engine.

The engine loom is completely seperate with 7 wires going back to the main loom for fuel pump (switched live.) fan, (Switched earth), Permanent Live, Ignition Live, Run, and Start (Switched Earth)


Friday, January 22, 2010

MX5 hits 200,000km


The MX5 rolled over 200,000km this week. I've done over 110,000KM since i bought the car, and looking back its done pretty well.

I bought the car with a missing big-end bearing, so replaced the engine at 90,000km. I replaced the engine, and had a couple of issues shortly afterwards with the water pump leaking which would have been easily replaced had it not failed at the side of the M1, Mike helped me out and a new cam belt, tensioner and pump where fitted in a couple of hours.

In 2007 Jerome managed to press hard enough on the passenger footwell that the footrest nipped the permanent live to the alarm causing a short and some smoke. In 2008 at 160,000 the differential pinion gear broke a tooth. Presumably due to the fitment of an aftermarket torsen LSD. In 2009 I had a moment after having found the OEM cigar lighter when cleaning the car out, I'd refitted it and a few days later whilst waiting on the boat at Dover the inside was filled with smoke as I must have knocked it on, and of course it didnt turn itself off again. In 2010, at 199,460km, the fan belt snapped on the way back from Germany, of course I had a spare sitting in the garage in preparation for the next major service. Other than that I've had no other issues with the car which I think is pretty good considering it is 18 years old. It starts first time, every time.

There are a few minor annoyances with the car, the bushes are getting a bit soft, and the original bilstein front shocks are showing signs of wear. The clutch release bearing is also a bit noisy and will be replaced soon along with the clutch and spigot bearing. The car eats about 1liter of oil every 3000km. The drivers seat is also a bit worn out now too, but generally despite damage caused by me being careless and the odd hummer reversing into it, its still in pretty good condition.

Over the last year I've covered 30,731KM, averaging 9.24L/100km with low 8s in the summer and low 9s in the winter time due to the aerodynamic drag of the lights I presume. The highest L/100km was 19L/100 recorded at the Nurburgring in April. I travel an average of 84km/day. The cost per KM works out at 0.13Euro including service and tax, not including insurance. (As this is on another policy for all my cars.)

The car is serviced every 10,000KM with new oil, filters, and plugs using good quality semi synthetic oil. Tires last about 20000km on the rear, and about 12-15000km on the front due to both excessive camber and the number of track days.

Monday, January 18, 2010

Little Jobs

Refitted the steering column, this was quite fiddly as it needed to be adjusted so that I can get in and out, as well as enabling me to get the dashboard on and off. If I ever take it off again I'll make up a set of shims rather than using about 20 washers to give the right spacing.

The dashboard was drilled to accept the rod for the gear change, and a final coat of glass matt on the underside where the brackets are. The brackets bolt to the bulkhead to give strength to the top, the front will bolt to the metal bar. I added some filler to some of the areas with imperfections. It is now ready for final fitment. I can't do that until the wiring is done and ideally not until after all the buttons/gauges/dials are fitted.

I noticed that there are a couple of drips from the coolant pipes so i may have to get some proper joiners made up.

I cleaned up the engine bay with the air line and blew out all the dust and fiberglass remains that had found there way in everywhere. I think the wiring will be the next major job to do will be the wiring as this is going to be the bottleneck for a few other jobs.

I started with some ideas for the rear lights, more to come on that another day.

Friday, January 1, 2010

Dashboard

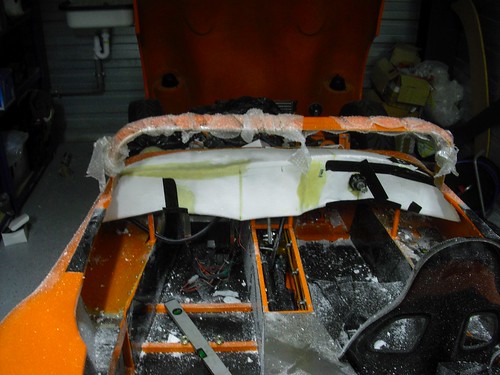
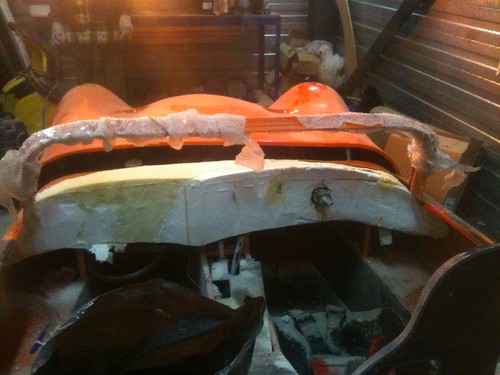
I started on the dashboard, I tried a few options in aluminium and wood, but it really needs to be curved. In the end I decided I'd just have to fabricate something in GRP. I want a dashboard that fits the curves of the car, does not get in the way, but is also easy to reach, has sufficient space for vents and instruments, and looks like it was designed rather than just made to fit.

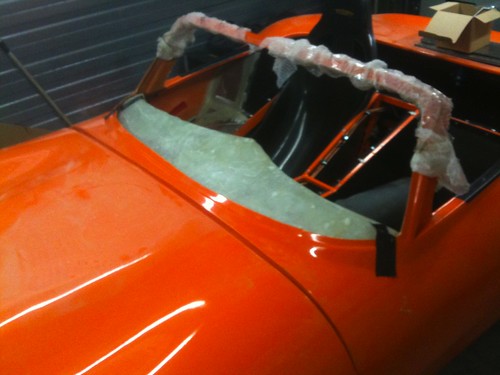
I first lined the area with bin bags as I was expecting to use a bit of expanding foam to fill in the gaps, I taped this all up to form a mostly water tight working area.

CIMG1203

I used sheets of polystyrene insulating material to form the buck, these were glued together to make a block, and material was removed to form the shape.

CIMG1206

The first idea was to have a dashboard that was more or less symetrical, with the center protruding forward. I visioned having a row of buttons on the the central part, the vents underneath. Completely flat with carbon fibre inserts, however the shape just doesnt fit the car, in order to get a large flat surface it has to protrude to far forward.

CIMG1213

I tried a few attempts at this shape using a flat part in the middle, but it just doesnt look right.

CIMG1216

CIMG1218

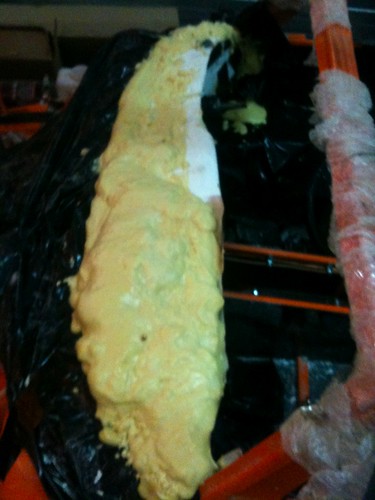
Once I had a buck that fitted the car well, rather than re-fabricate it each time I needed to add material or made a mistake, i used two part expanding foam. This stuff is pretty messy but very convenient.

IMG_1076

Using some tape and gravity you get a reasonable amount of control over the shape that the foam will form.

IMG_1077

The end result was that the center part needed to be in line with the rest of the dashboard, so i tried a few options using simple curves.

IMG_1080

IMG_1081

I found that I like the rearward face of the dash to be close to vertical, or even slightly tapered upwards, with the two curves meeting in line with the edge of the transmission tunnel.

The top is a smooth radius between the front bulkhead and the edge of the dashboard. This gives plenty of clearance for the gear shifter, my hands around the steering wheel, and my legs without being too far away to reach.

IMG_1083

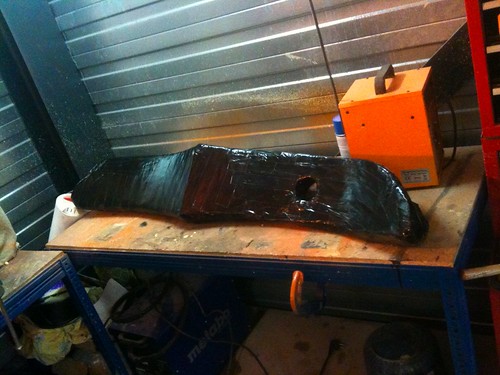
Once the buck was the right shape I covered it in duct tape and release agent in order to make the dash itself. I was getting to the point where it was becoming impossible to sand the buck due to the changes in surface materials and their differing hardness. I decided the best option is to just make the dashboard, and use some filler to get a smooth surface, its very close already so shouldnt require much effort.

IMG_1111

Once made, I did a quick trial fit and trimmed it where required.

IMG_1112

IMG_1113

I've now sanded it down and added filler to a few places. Once I get the dials and buttons I'll fit them, and then cover the dashboard in Alcantara before final fitment.