Thursday, April 26, 2012
Moved
I've come to the point where i've outgrown blogger, I've now moved over to my own wordpress site where I can bring all the various tools i'm working on as well as my blog under one roof so to speak.
Read On.
Friday, September 3, 2010
Rear wheel bearings
I decided to replace the rear wheel bearings on the seven as they were making a bit of noise. To make life easier i knocked up a stand for the rear of the car which means I can stick it on the stand rather than using floor standing axle stands or a trolley jack to support the car. This proved very useful.

The theory is you remove the hub, and undo the bolts that hold the bearing in place, and use a slide hammer to yank out the half shaft. Not having a slide hammer compounded this, but the first one came out with a few stern blows with two hammers on a back to front hub (providing me with something substantial to hit.)
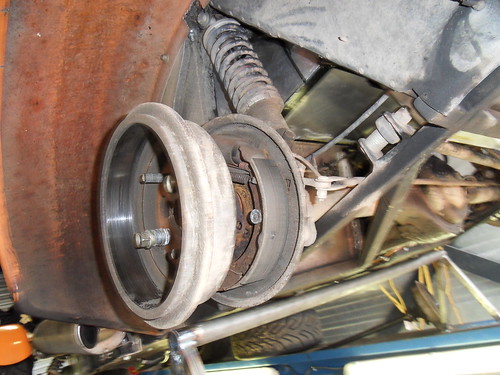
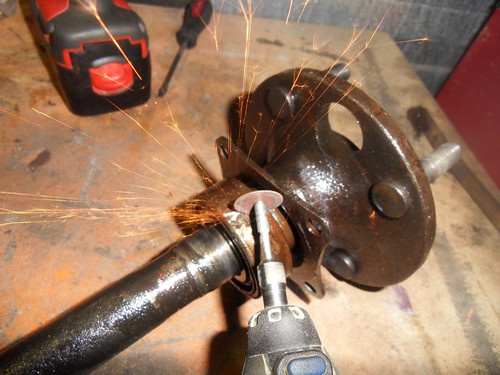
The other took many hours of smacking with hammers, chisels, heat and general swearing before it gave up. I cut a groove into the bearing itself, and then used a cold chisel to break it off, this worked pretty well. The new bearings are now ready to fit, and will get pressed into place by my local garage.
The theory is you remove the hub, and undo the bolts that hold the bearing in place, and use a slide hammer to yank out the half shaft. Not having a slide hammer compounded this, but the first one came out with a few stern blows with two hammers on a back to front hub (providing me with something substantial to hit.)
The other took many hours of smacking with hammers, chisels, heat and general swearing before it gave up. I cut a groove into the bearing itself, and then used a cold chisel to break it off, this worked pretty well. The new bearings are now ready to fit, and will get pressed into place by my local garage.
Seven Trip to spain
Not much driving weather this year, however I did manage to get a trip to spain with some friends, they were flying from all over the place, so I drove down through france on my own. The weather was forecast to be wet (Imagine my surprise) so I decided to take it easy over a few days as it can be pretty miserable driving when the water is coming in through the drain holes.
The first day was mainly getting through the Netherlands and Belgium, which is miserable at best, but the rain was just damp rather than biblical, so quite good fun. Northern france got a bit wetter, but started to dry up by the time I got to Dijon. I had a bit of a moment when there was a horrible metalic noise, I thought at first the alternator had come off again, which was surprising as its threadlocked, and lockwired, but alas it was only the number plate which had come off at one side. I just undid it and threw it in the boot where it will stay for the time being.
I went through about half a litre of oil on the way to dijon, so apparently I still have a major oil leak out the sump. Grumble.
The next day was towards the Tarn, the morning was very wet, and very slow, but the roads were nice, and fairly quiet, in the afternoon it turned to random showers, and the scenery changed into some nice twisty mountain roads, i went over numerous cols, and found I far prefer the Yokohama A048 tyres over the Toyos, it just feels more planted.
The sun came out just in time for Mende, so I spent a few hours going up and down Cols and mountain roads, the car is really on form, traffic is minimal and i'm enjoying every second. I stop for some groceries, and go out for another our or so before stopping for the night in a camping.
The next day I followed to Tarn gorge, before heading up the side, and over the Millau bridge. At this point I noticed that the alternator output was lower than it should, and the ignition light was flickering. Having had an alternator fail a year ago I know all about the tell tales signs, but the ammeter was flickering all over the place. I also know that David ashurst has been plagued with ignition light flickering recently and that its caused by an electrical connection in the lucas plug. I pulled over and cleaned it up, and squashed the connector a little to provide a better connection, and the problem was solved.
Traffic was obnoxiously bad so I just followed the coast down to spain and then cutting off a pininsula and coming over an amazing bit of road into calonge.

The week was spent driving shorted distances over some great stretches of road in the costas, with a different passenger for every trip. The car was in great form for the most part, with a crack in one of the vaccum connectors forming and causing an air leak which was a bit of a pain for the rest of the day until I got back home and resolved it.

The way back I went pretty much dead straight home, doing around 130kph most of the way up the peage, everything was fine till belgium when I noticed a small water leak when refuelling, there was a pinhole in one of the hoses, so I just cut it off and shuffled it up a little which got me home. I also noticed the fuel consumption was up for the last tank, which turns out was a fuel leak in the tank (again) so I'll add that to the list of jobs to do which is currently:
* Adjust the position of the gear box so it doesn't vibrate against the crossmember on hard left turns.
* Fix the fuel leaks from the tank
* Replace the rear wheel bearings which are getting a little noisy
* Make the speedo work again.
The first day was mainly getting through the Netherlands and Belgium, which is miserable at best, but the rain was just damp rather than biblical, so quite good fun. Northern france got a bit wetter, but started to dry up by the time I got to Dijon. I had a bit of a moment when there was a horrible metalic noise, I thought at first the alternator had come off again, which was surprising as its threadlocked, and lockwired, but alas it was only the number plate which had come off at one side. I just undid it and threw it in the boot where it will stay for the time being.
I went through about half a litre of oil on the way to dijon, so apparently I still have a major oil leak out the sump. Grumble.
The next day was towards the Tarn, the morning was very wet, and very slow, but the roads were nice, and fairly quiet, in the afternoon it turned to random showers, and the scenery changed into some nice twisty mountain roads, i went over numerous cols, and found I far prefer the Yokohama A048 tyres over the Toyos, it just feels more planted.
The sun came out just in time for Mende, so I spent a few hours going up and down Cols and mountain roads, the car is really on form, traffic is minimal and i'm enjoying every second. I stop for some groceries, and go out for another our or so before stopping for the night in a camping.
The next day I followed to Tarn gorge, before heading up the side, and over the Millau bridge. At this point I noticed that the alternator output was lower than it should, and the ignition light was flickering. Having had an alternator fail a year ago I know all about the tell tales signs, but the ammeter was flickering all over the place. I also know that David ashurst has been plagued with ignition light flickering recently and that its caused by an electrical connection in the lucas plug. I pulled over and cleaned it up, and squashed the connector a little to provide a better connection, and the problem was solved.
Traffic was obnoxiously bad so I just followed the coast down to spain and then cutting off a pininsula and coming over an amazing bit of road into calonge.
The week was spent driving shorted distances over some great stretches of road in the costas, with a different passenger for every trip. The car was in great form for the most part, with a crack in one of the vaccum connectors forming and causing an air leak which was a bit of a pain for the rest of the day until I got back home and resolved it.
The way back I went pretty much dead straight home, doing around 130kph most of the way up the peage, everything was fine till belgium when I noticed a small water leak when refuelling, there was a pinhole in one of the hoses, so I just cut it off and shuffled it up a little which got me home. I also noticed the fuel consumption was up for the last tank, which turns out was a fuel leak in the tank (again) so I'll add that to the list of jobs to do which is currently:
* Adjust the position of the gear box so it doesn't vibrate against the crossmember on hard left turns.
* Fix the fuel leaks from the tank
* Replace the rear wheel bearings which are getting a little noisy
* Make the speedo work again.
Fuel tank and wheel bearings
I've had nothing but bother with the fuel tank since I had it made to my design by a company in the UK. First they forgot the order, then when it finally arrived it leaked fuel all over the place, and to top it all they over charged my credit card by 100 pounds. I still haven't had a refund for the difference let alone the leak stopped. This all came to a head last week when I went out for a quick drive and could smell petrol. I turned around and went home, when I arrived I could see a steady stream of fuel dripping out the rear of the car, the weld had failed in the swirl pot.
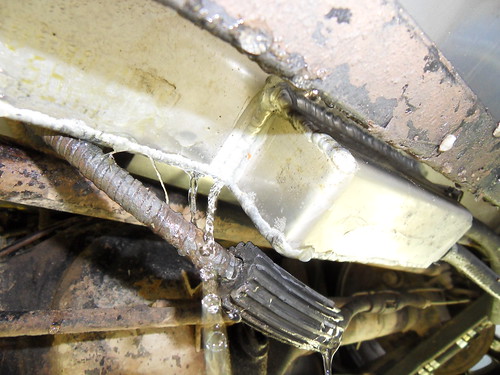
I decided it was time to get the fuel tank out and fix it properly, before doing so I drained the tank and filled it with water, I could see it driping out of a seam at quite a rate. I took the tank out at this point (which requires dismantling most of the rear of the car.) and decided to pressurize the tank a little so i could find all the other little leaks too. At 5psi the tank burst along the top seam. The welds are terrible, and not very deep, which left a 9" gash along the top.
I didn't want to waste any more summer driving time, so I decided to fix it myself. I borrowed hans' TIG welder and set about learning to weld with it, its not easy, and for some reason I seemed to get electric shocks off the welder very regularly, but I did manage to get to the point where I could run a consistently deep, if not very tidy weld, so moved onto the tank. I welded in a bit of right angled aluminum along the top as the gap was too big for me to weld up again, and welded up the seam at the bottom of the tank all the way along. It stopped leaking streams but it still leaked a drop here and there at 10psi.
I've now sealed the tank with some Tapox tank sealer, so hopefully this should do the trick, over the winter I'll probably get a new one made up as I don't trust this tank any more.
Interior Finished
I finished the interior of the car this weekend. I was being held up mainly as I had to wait on some parts. I had to fit the on/on/on switch for the wipers, however in some fit of mouser madness I misread the part number and whilst it is an on-on-on switch, its actually not any use on its own, as its positions are Z+X X+A A+B which means I still need to use a relay. So I just broke, and wired up a relay that breaks the park circuit when the wipers are on. They wipe, and seem to do so pretty quickly.
I fitted the replacement flasher, which flashes, and checked all the switches function as they should. They did, so I bolted in the dash, its pretty solid, and fits just the way it should. I think it looks really good, and am very pleased with the end result. It was definitely worth all the mess. I cleaned the interior with an air gun, hoover, and fabric cleaner, and routed the internal wiring, and stuck down the side carpets. The immobilizer stopped working because the sensor was too far away from the fob, so i need to move it somewhere else, but I'm not sure where yet.

I then trimmed down the seat belt tails to a more sensible size, i went for six inches past the buckle. Next up was to trim around the windscreen. My plan here is to use alcantara, with one edge tucked under the windscreen ever so slightly (should be fine since its bonded in place with copious amounts of PU) and the other is held down with some U trim which also puts the required radious on the edge of the windscreen surround. I then used contact adhesive in the bits in the middle, so hopefully it will all stay up there. It was fiddly and took forever, but looks pretty good now.

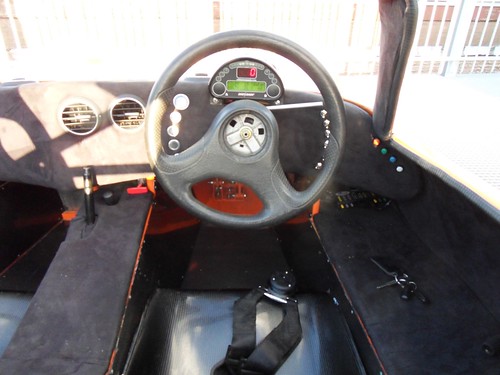
I bolted up the hideous sierra steering wheel, and checked everything worked, it did so had a celebratory drive around the car park, gear change is crappy since there is no tactile feedback from the lever, but this will be easily remedied post IVA. The car is pretty quick, first gear is pretty tall though, i'm hoping the 3.21 diff was the right choice afterall. The interior is now finished, I'll need to start covering it when i'm doing messy jobs to try and keep it nice and clean.
I fitted the replacement flasher, which flashes, and checked all the switches function as they should. They did, so I bolted in the dash, its pretty solid, and fits just the way it should. I think it looks really good, and am very pleased with the end result. It was definitely worth all the mess. I cleaned the interior with an air gun, hoover, and fabric cleaner, and routed the internal wiring, and stuck down the side carpets. The immobilizer stopped working because the sensor was too far away from the fob, so i need to move it somewhere else, but I'm not sure where yet.
I then trimmed down the seat belt tails to a more sensible size, i went for six inches past the buckle. Next up was to trim around the windscreen. My plan here is to use alcantara, with one edge tucked under the windscreen ever so slightly (should be fine since its bonded in place with copious amounts of PU) and the other is held down with some U trim which also puts the required radious on the edge of the windscreen surround. I then used contact adhesive in the bits in the middle, so hopefully it will all stay up there. It was fiddly and took forever, but looks pretty good now.
I bolted up the hideous sierra steering wheel, and checked everything worked, it did so had a celebratory drive around the car park, gear change is crappy since there is no tactile feedback from the lever, but this will be easily remedied post IVA. The car is pretty quick, first gear is pretty tall though, i'm hoping the 3.21 diff was the right choice afterall. The interior is now finished, I'll need to start covering it when i'm doing messy jobs to try and keep it nice and clean.
Friday, August 27, 2010
Floor Finished
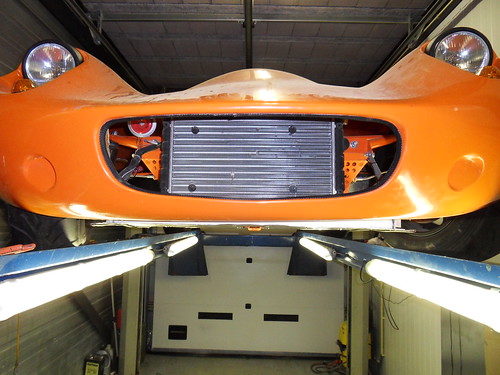
I fitted the rear diffuser today, it runs the full width of the car, and starts at the rear bulkhead running flush with the rear of the bodywork. Its bolted on with M5 rivet nuts, however as it should be an aerodynamic aid providing some downforce, i wanted to make sure it didnt flex. I've added three tubes bolted in place at the rear to pull down on the bodywork. The look is growing on me, at first it looked a little bit to MaxPower, but its wearing off. As it will count as above the floor line, it needs to have a radiused edge, so i've added some U trim to protect mr IVA man and his delicate little fingers.
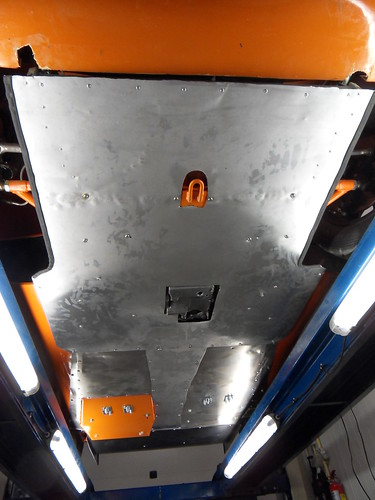
At the front I fitted a bit of right angle aluminum to eliminate the gap between the bodywork and the floor, you don't notice it, but I want to force air in the front of the car through the nose, not through the floor where possible. I added some U trim around the aluminum floor to protect me and my delicate little fingers.
I removed the sidepods and cleaned up all the dust in them, and bolted down the bonnet clips. It took ages to get a good shut line again after I put them on, so I hope I don't need to do this too often. The floor is now complete, and I think it looks pretty good.
Inside I fitted the heater hose, I then decided there wasnt enough air coming out the vents so added another hose at the other end which required some cutting and shutting of the fixtures and fittings, but now provides a bit of a blast when the fan is on.
I added a T-Pull handle for the fire extinghuisher, its within arms reach under the center console, but well out of the way in case it gets pulled accidentally.
Friday, August 20, 2010
Wipers and Intercom
Fitted the windscreen wipers, these have a 95 degree sweep, so I've mounted the offside one just to the right of the steering wheel center, and the other about 5" to the left of where the tip of the blade finishes. Finding the position was easier than I expected, using a protractor and the arms and some tape I put them in various positions and checked that the were not missing anything in my field of vision.
Fitting the wheel boxes to the motor on the other hand was endless frustration. The theory is simple enough, there is a corrugated flexible bit of wire that runs through some copper tube from the motor to the wheel boxes, the wheel in the wheel boxes is turned by the teeth on the wire, the wire is pushed and pulled by a crank on the end of the spindle.
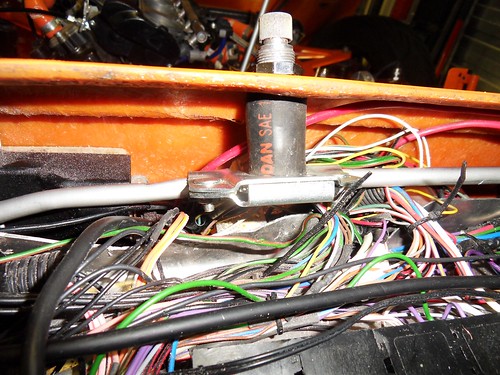
I measured and cut the tube, and used a mandrel to bend it into the right shape, offered it up to the wire, and of course, it didn't go in. The wire is about 8mm, as is the ID of the copper tube. I de-burred the edge, and tried again and it got as far as the first bend, where of course it was too narrow to go any further. I spent a good few hours trying smaller radius bends, before finding another roll of ever so slightly larger tube that allowed at least some movement.
I then flared the end, before noticing that i hadn't put the nut on yet, after remedying that I offered up the rather inflexible assembly to the wheel box. This is located under the windscreen, above the electrical tray. It fits in there with a bit of bending, but removing the nuts on the end require the patience of job. These nuts are used to clamp the copper pipe in place, the wire then goes through the wheel box, and into another section of copper tube. I spent a good hour wiggling, and eventually managed to get the wire to pass over the lip on the clamp, another eternity tightening it up, before i (thankfully) had the good wisdom to test it worked, because as soon as i pressed the button the fuse popped. Tried again with a slightly larger fuse, and it pushed the flare out the motor end, i yanked on the wire and it was locked solid.
I assumed this was down to the cable being crushed, but after removing it, it was obvious that you have to thread the wire through the wheel box, as there is not enough of a gap for it to sit home if you don't, so basically when i tightened up the clamp i was just locking the wire in place.
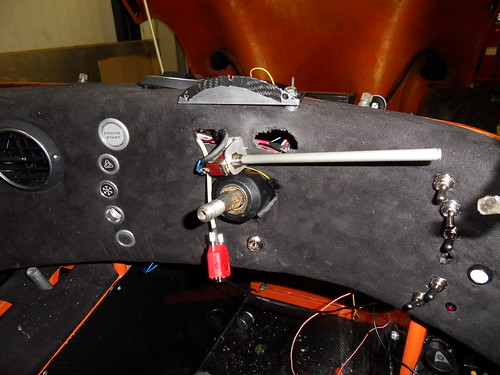
I decided at this point, that things were getting too complicated, so i decided to use 10mm ally tube, and move the motor inside the car to eliminate the need for tight bends in the tube, this should allow the mechanism to run smoothly as well as making it easier to fit.
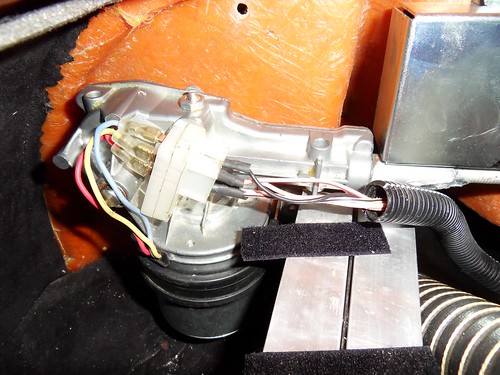
I drilled out the brass nut on the motor to 10mm, and put a flare on the tube, put the nut in a vice and screwed in an alloy boss which sits in the motor housing and is clamped in place by the cover of the motor. Of course i over tightened it and it sheered away in my hand. This was turning into a bit of a bodge, so after a bite to eat, i decided the best option was to make a new boss. (its simply a T shaped bit of metal with a hole in it) I did this by taking some alloy bar, turning it down so it had a lip on it. I then brazed the alloy tube to it using durafix, and some air of professionalism started to return to the finished result.
With it all bolt in place, the mechanism moves very smoothly, and is rock solid, which was pretty much what I wanted. I can now keep myself awake when i sit in the car by being slapped in the face by the wiper arm until I get round to sorting out a windscreen.
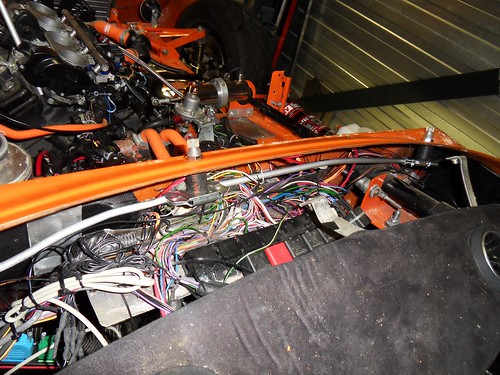
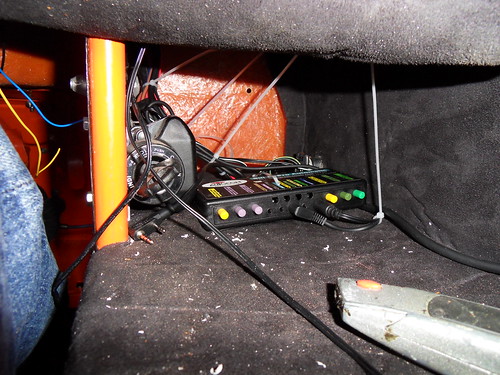
Next job was to fit the intercom. I've mounted it on the sidepod to my right, just at the end of my arms reach under the dash, to make the wiring tidier, i drilled a series of holes in the back of the casing and routed the power, and comms wires out there, leaving just the inputs for the music/gps etc at the front. The wires for the headsets will run along the outside of the sidepod to their rubber mounts.
The side repeaters are also fitted and wired up, along with an indicator switch and working hazard switch (Using a conventional way of doing things.) which will do until SVA, although for some reason my flasher wont flash, i tried a different flasher, and it flashes, but at the wrong rate due the LED lights, so i've ordered a replacement LED flasher unit.

I made a very crude, and tbh not very good shift lever by extending a momentary on toggle switch with some alloy tube, this will do until I get rid of the ginormous sierra steering wheel (Post IVA) and can fit a proper flappy panel wotsit behind the smaller momo one.
Fitting the wheel boxes to the motor on the other hand was endless frustration. The theory is simple enough, there is a corrugated flexible bit of wire that runs through some copper tube from the motor to the wheel boxes, the wheel in the wheel boxes is turned by the teeth on the wire, the wire is pushed and pulled by a crank on the end of the spindle.
I measured and cut the tube, and used a mandrel to bend it into the right shape, offered it up to the wire, and of course, it didn't go in. The wire is about 8mm, as is the ID of the copper tube. I de-burred the edge, and tried again and it got as far as the first bend, where of course it was too narrow to go any further. I spent a good few hours trying smaller radius bends, before finding another roll of ever so slightly larger tube that allowed at least some movement.
I then flared the end, before noticing that i hadn't put the nut on yet, after remedying that I offered up the rather inflexible assembly to the wheel box. This is located under the windscreen, above the electrical tray. It fits in there with a bit of bending, but removing the nuts on the end require the patience of job. These nuts are used to clamp the copper pipe in place, the wire then goes through the wheel box, and into another section of copper tube. I spent a good hour wiggling, and eventually managed to get the wire to pass over the lip on the clamp, another eternity tightening it up, before i (thankfully) had the good wisdom to test it worked, because as soon as i pressed the button the fuse popped. Tried again with a slightly larger fuse, and it pushed the flare out the motor end, i yanked on the wire and it was locked solid.
I assumed this was down to the cable being crushed, but after removing it, it was obvious that you have to thread the wire through the wheel box, as there is not enough of a gap for it to sit home if you don't, so basically when i tightened up the clamp i was just locking the wire in place.
I decided at this point, that things were getting too complicated, so i decided to use 10mm ally tube, and move the motor inside the car to eliminate the need for tight bends in the tube, this should allow the mechanism to run smoothly as well as making it easier to fit.
I drilled out the brass nut on the motor to 10mm, and put a flare on the tube, put the nut in a vice and screwed in an alloy boss which sits in the motor housing and is clamped in place by the cover of the motor. Of course i over tightened it and it sheered away in my hand. This was turning into a bit of a bodge, so after a bite to eat, i decided the best option was to make a new boss. (its simply a T shaped bit of metal with a hole in it) I did this by taking some alloy bar, turning it down so it had a lip on it. I then brazed the alloy tube to it using durafix, and some air of professionalism started to return to the finished result.
With it all bolt in place, the mechanism moves very smoothly, and is rock solid, which was pretty much what I wanted. I can now keep myself awake when i sit in the car by being slapped in the face by the wiper arm until I get round to sorting out a windscreen.
Next job was to fit the intercom. I've mounted it on the sidepod to my right, just at the end of my arms reach under the dash, to make the wiring tidier, i drilled a series of holes in the back of the casing and routed the power, and comms wires out there, leaving just the inputs for the music/gps etc at the front. The wires for the headsets will run along the outside of the sidepod to their rubber mounts.
The side repeaters are also fitted and wired up, along with an indicator switch and working hazard switch (Using a conventional way of doing things.) which will do until SVA, although for some reason my flasher wont flash, i tried a different flasher, and it flashes, but at the wrong rate due the LED lights, so i've ordered a replacement LED flasher unit.
I made a very crude, and tbh not very good shift lever by extending a momentary on toggle switch with some alloy tube, this will do until I get rid of the ginormous sierra steering wheel (Post IVA) and can fit a proper flappy panel wotsit behind the smaller momo one.
Subscribe to:
Comments (Atom)